My latest project with the Dumpling is to make trendy animals (ex: llamas, flamingos, narwhals, etc.) from the past and present. Owls, of course, made the list because they were everywhere back in the early 2010s due to Harry Potter mania. The birds were inescapable, being featured in clothes, home decor, and toys and even becoming popular household pets.
The first thing that comes to mind when I think about owls are their eyes, so the Dumpling and I made ones that blinks and winks…among other expressions.
Tip: It is easier to cut out the eyes from the owl with an X-Acto knife!We colored our owls by stamping them with bubble wrap.
2. Glue two pairs of eyes together. Select two pairs of eyes from the template (or draw your own) and hole punch where indicated. Position one pair in front of you, then vertically flip (very important!) the eyes over to glue the second pair onto the backside.
3. String a thin wire through the eyes and tape the wire in place on the back of the owl. (I only had floral wire…that’s why it is green!)
The photos on my phone are an un-curated mess, filled with blurred, unflattering, or accidental shots that should have been deleted long ago. As a result, the Dumpling and I would often get distracted by the 10,000+ images other than the ones I want to show her.
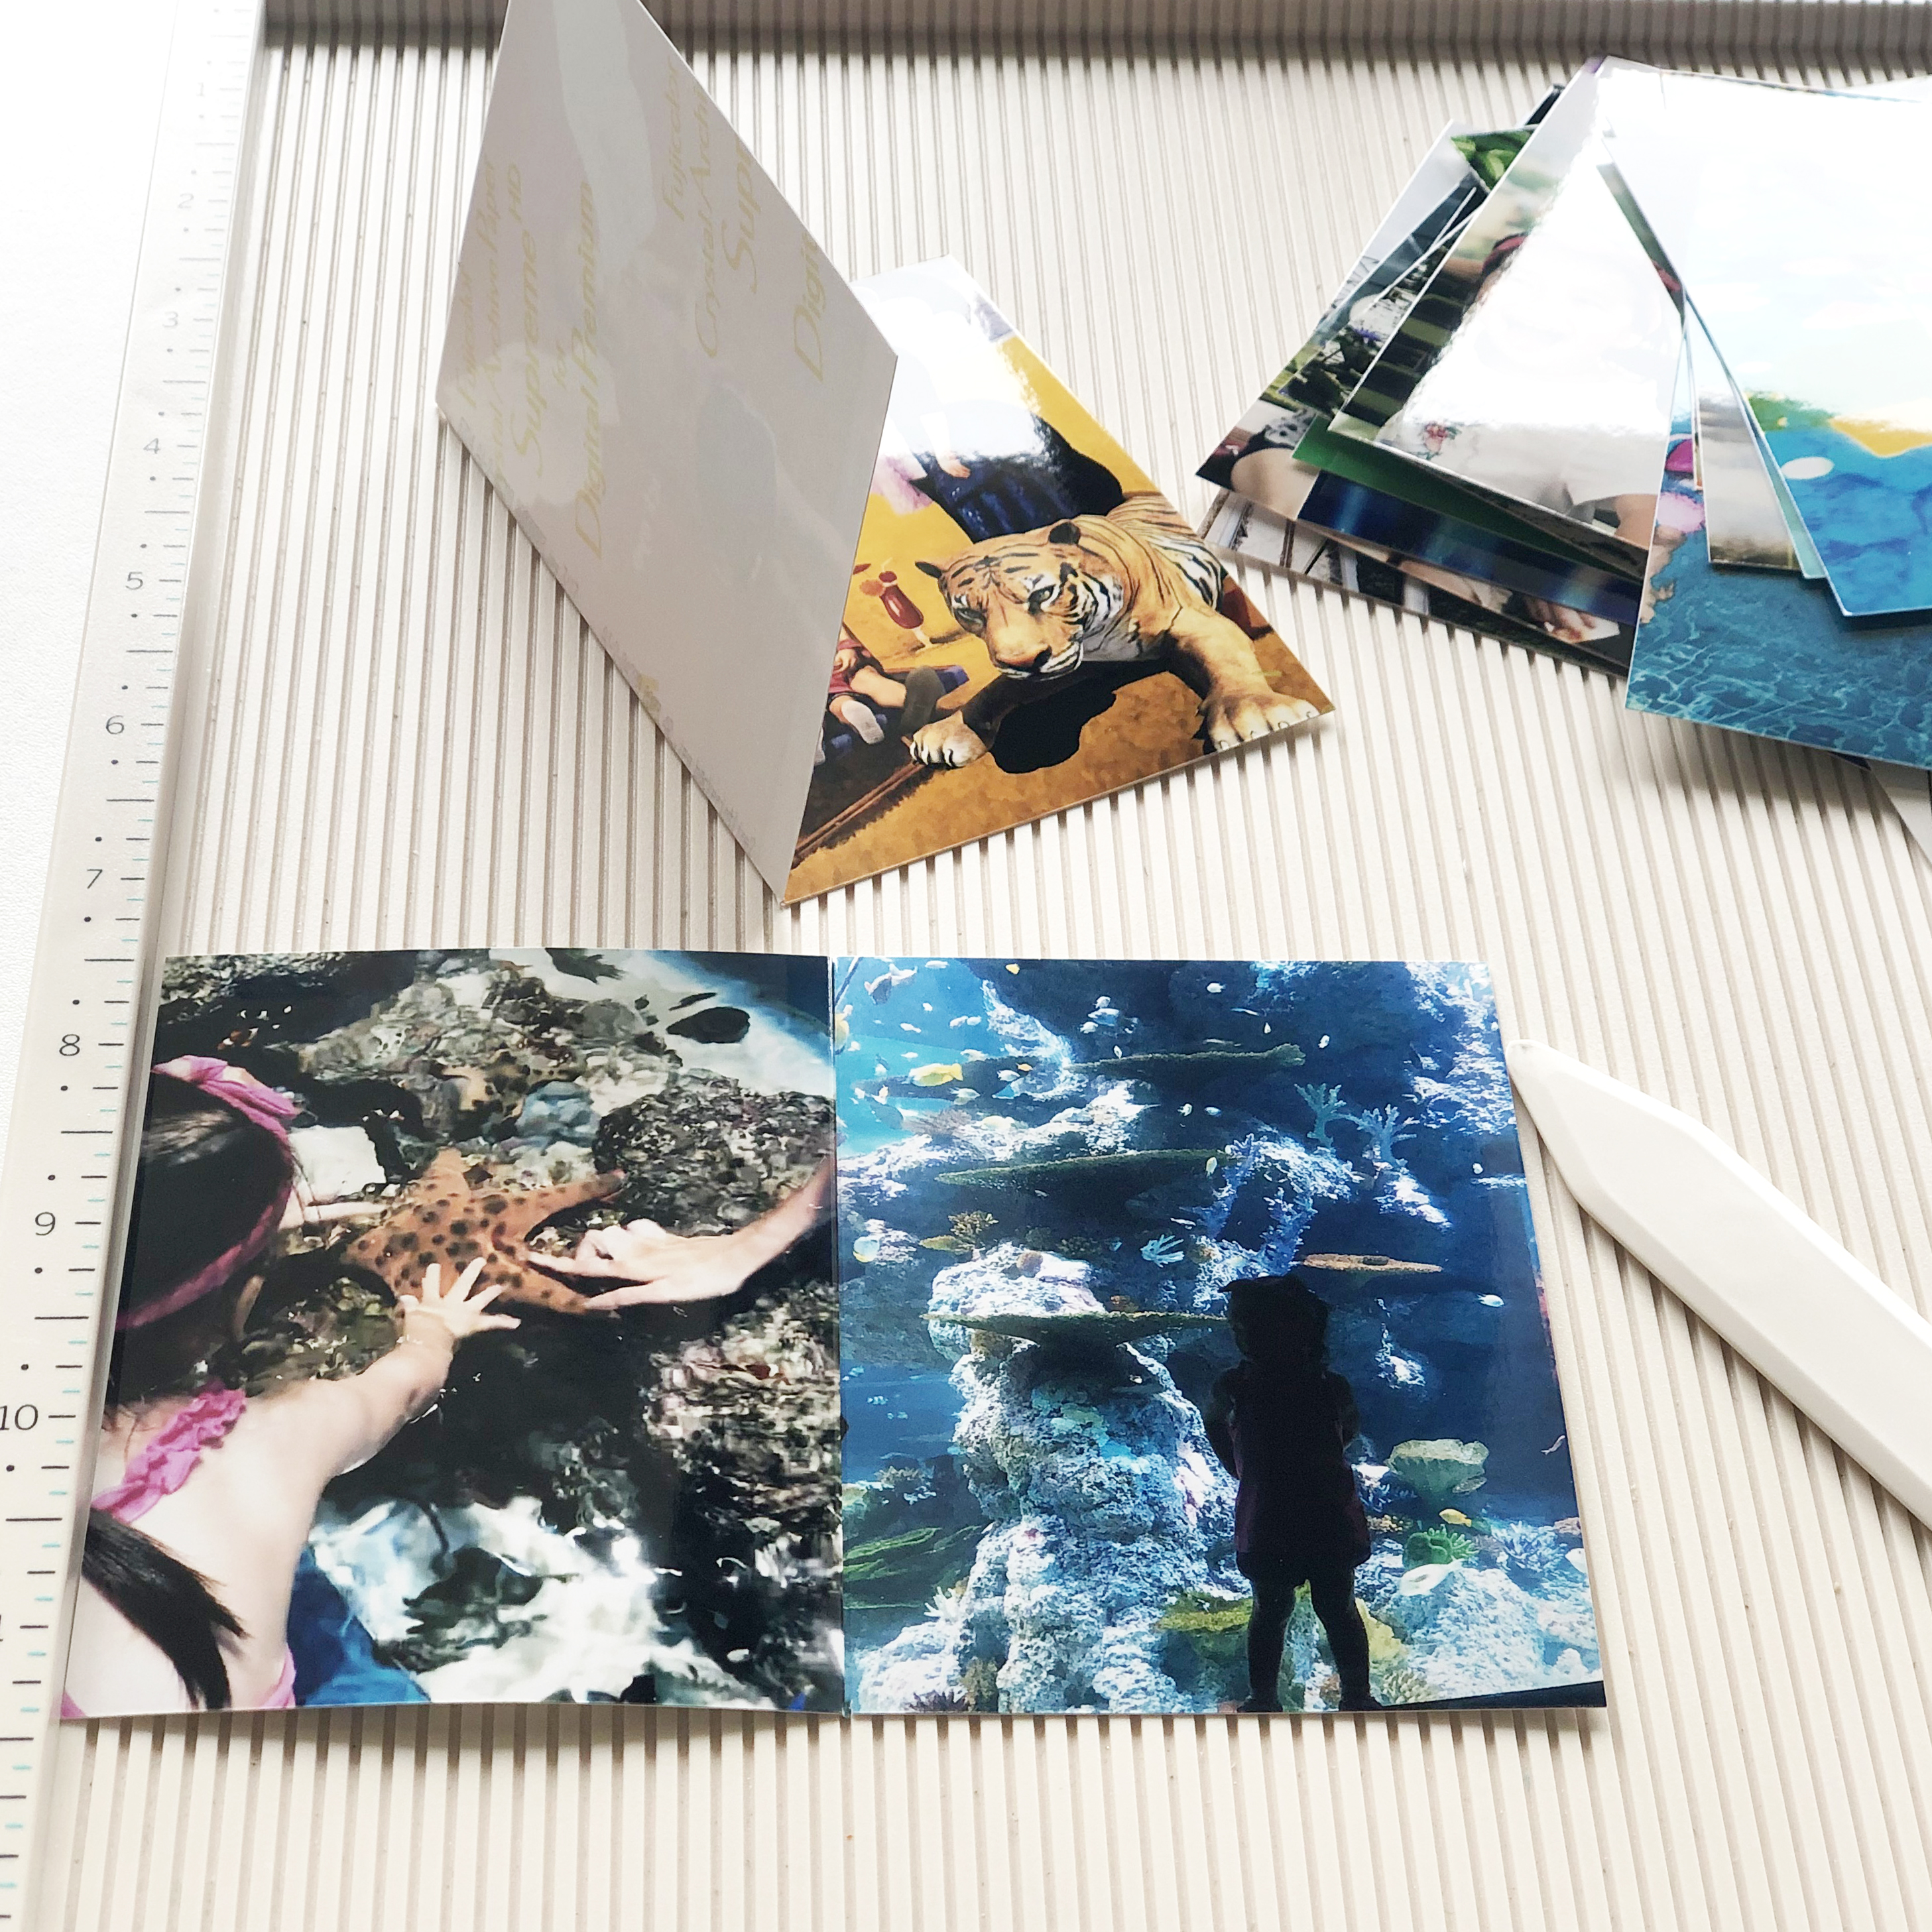
After our recent family vacation, I printed a few photos that highlighted our trip and bound them into a miniature book. Sharing real, physical pictures was such a refreshing experience in this digital age. The format helped the Dumpling better recount the events in chronological order and served as a keepsake of our holiday.
The book served as a personal keepsake or can be given away as a personalized gift!
The photo book, which measures 3″ w x 4″ h, was made from folding a standard 6″ x 4″ photo in half. The below tutorial shows how to print two images per spread. To create one image per spread, just print directly from your phone.
1. Adjust slide size to standard 6″ w x 4″ h photo dimensions in a blank PowerPoint presentation.
2. Delete any text boxes on the slide. PowerPoint inserts the title and subtitle text boxes on the first slide by default, so select both and delete.
3. Insert 3″ w x 4″ h rectangle on the left half of the slide. PowerPoint uses a blue rectangle and black outline by default. While it does not matter what the fill color is, remove the shape outline. This is where the picture on the left spread will be.
4. Duplicate the rectangle and place it on the right half of the slide. This is where the picture on the right spread will be.
5. Fill the rectangles with photos. Instead of filling the shape with a color, select the option to fill it with an image. Repeat steps 3-5 on additional slides until reaching the number of desired pages (my recommendation is approximately 10-20).
(Pro-tip: Add text on top of the photos to tell a story!)
6. Convert the slides in JPGs. My local print shop only prints photos from JPGs or PNGs, so I had to convert my PowerPoint file into the acceptable format. I could not figure out how to export the images without compromising on the resolution (even though I checked all the settings!), so my workaround was to first save the slides as a PDF.
Then I converted the PDF into JPGs in Adobe Acrobat. If you do not have Acrobat, there are free conversion apps online.
7. Print on regular 6″ x 4″ photo paper.
8. Score and fold each printed photograph in half. Scoring creates a cleaner fold, especially on thicker paper stocks. If you do not have a scoring board, layer a folded towel under the photo, place a ruler on where the score line should be, and run the edge of an old credit card along the ruler to create the score line.
9.With the edges aligned, tape the back of the photos together using double-sided tape. I applied tape on the top, bottom, and outer margins of the photo, but not the inner margin located along the fold.
Once the photos are taped together, they form the inside pages of the book and the folds make up the spine.
10. Press the photos together under something heavy (i.e. textbooks) for about 24 hours. This limits the pages from puffing open on their own.
11.Tape the spine tightly together and then measure its width. This width varies depending on the number of pages, weight of the photo paper, and how well the pages were compressed together. For example, the width of my spine was approximately 0.5″. If unsure, add no more than 0.125″ to the measurement.
12. Create the book cover in PowerPoint. The process is similar to creating the inside pages of the book as demonstrated above, so I did not splice the demo video up into individual steps. In summary, adjust the slide size to US Letter dimensions (11″ x 8.5″) and insert a rectangle with the following dimensions: (6″ + width of spine spine) x 4″. For my example, it would be 6.5″ w x 4″ h. The rectangle should be placed at least 0.25″ away from the edges of the slide to prevent the image from being cut off during printing.
I have also added lines (at the 3″ and 3.5″ mark) to help indicate where I needed to score the book spine.
When “filling” the the rectangle with an image, PowerPoint automatically stretches the picture, so manually change this setting by switching to “Fit” under the “Crop” drop-down. To enlarge or shrink the image proportionally, click and drag the white circles on the corners AND hold down the SHIFT key simultaneously.
Cover image is downloaded from Freepik.
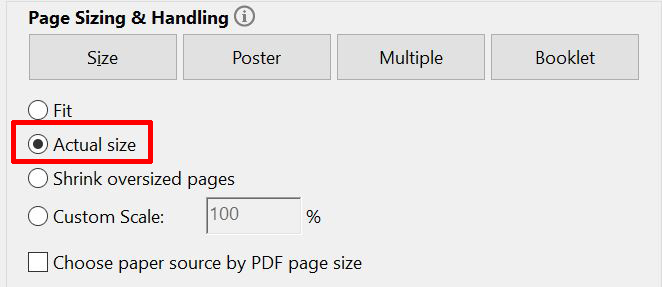
13. Print. I used standard 8.5″ x 11″ card stock. When printing, select “Actual Size” in the setting to prevent the printer from changing the image size.
14.Score and fold where spine ought to be, then cut out the cover.
15. Tape the cover onto the first and last page of the book. Again I only taped the top, bottom, and outer margins. Do not tape the spine of the book onto the cover because there needs to be wiggle room for the book to open and close.
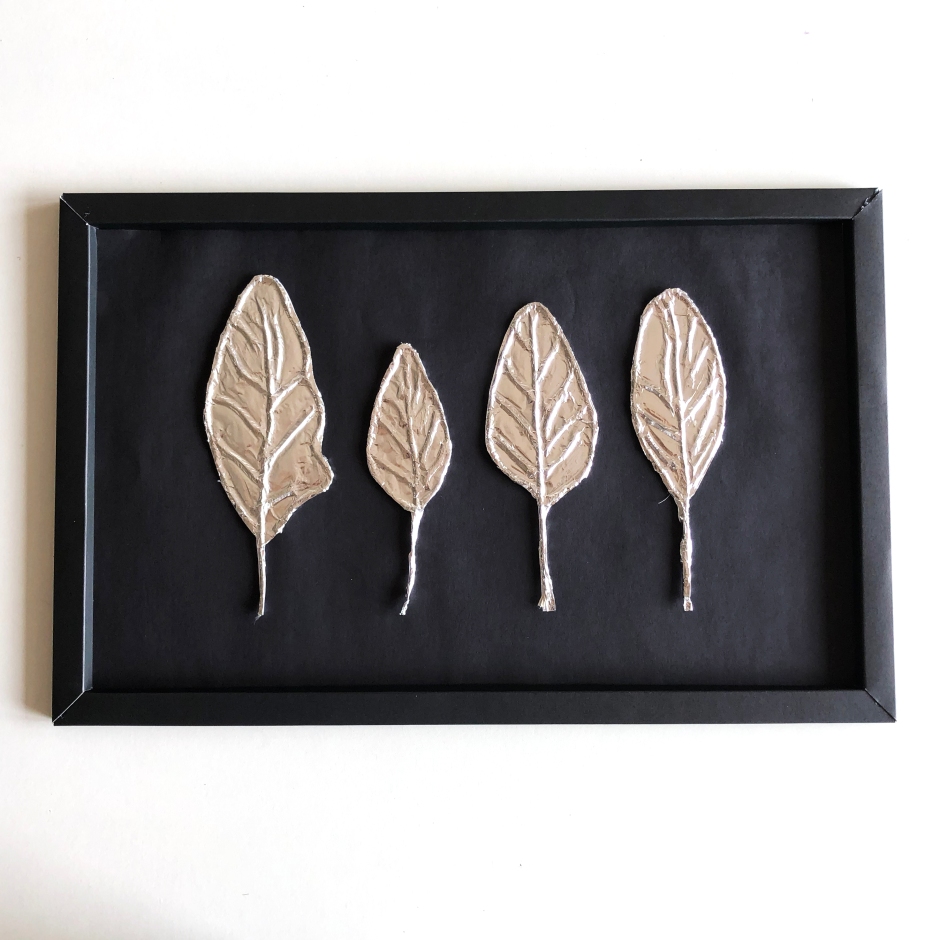
DIY metallic embossing — with embossing powder, special ink, and heat gun, has always sounded complicated and messy to me, so imagine my surprise when I discovered that a kid-friendly version can be created with aluminum foil. This project allows lots of room for error, so it is great for toddlers still working on their fine motor skills.
Trace design with glue. Smudges are okay since everything will be covered up by the foil anyways.
Glue string/twine onto the design. For my leaf design, I cut the string into varying lengths beforehand and let the Dumpling chose which ones to use. I was not picky about placement. If you are, however, the strings can easily be re-arranged since the glue took a while to dry.
Apply more glue surrounding the image and on top of the string,cover with a sheet of foil with shiny side up, and gently rub on the raised image.
Let dry, cut along the outlines, and glue the leaves onto the black cardstock. Any color paper can be used, but I preferred black since it brought out the metallic silver.
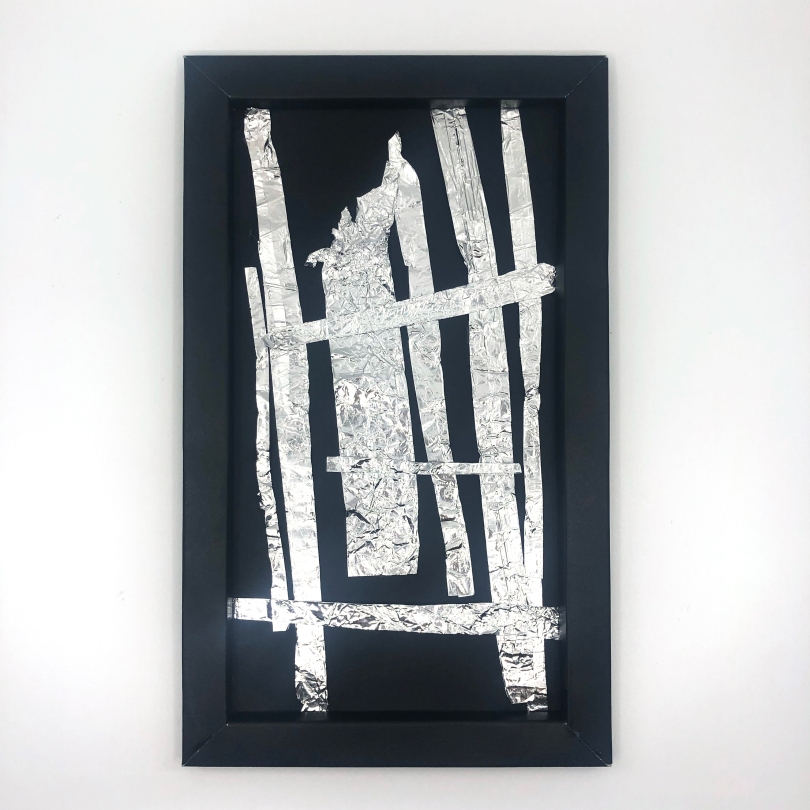
Bonus: Turn the leftover foil into abstract art. Crumples, rips, and wrinkles are interesting textures, so fold the leftover foil into strips of varying lengths and widths. Then ask your toddler for their expert arrangement to create a piece of abstract art.
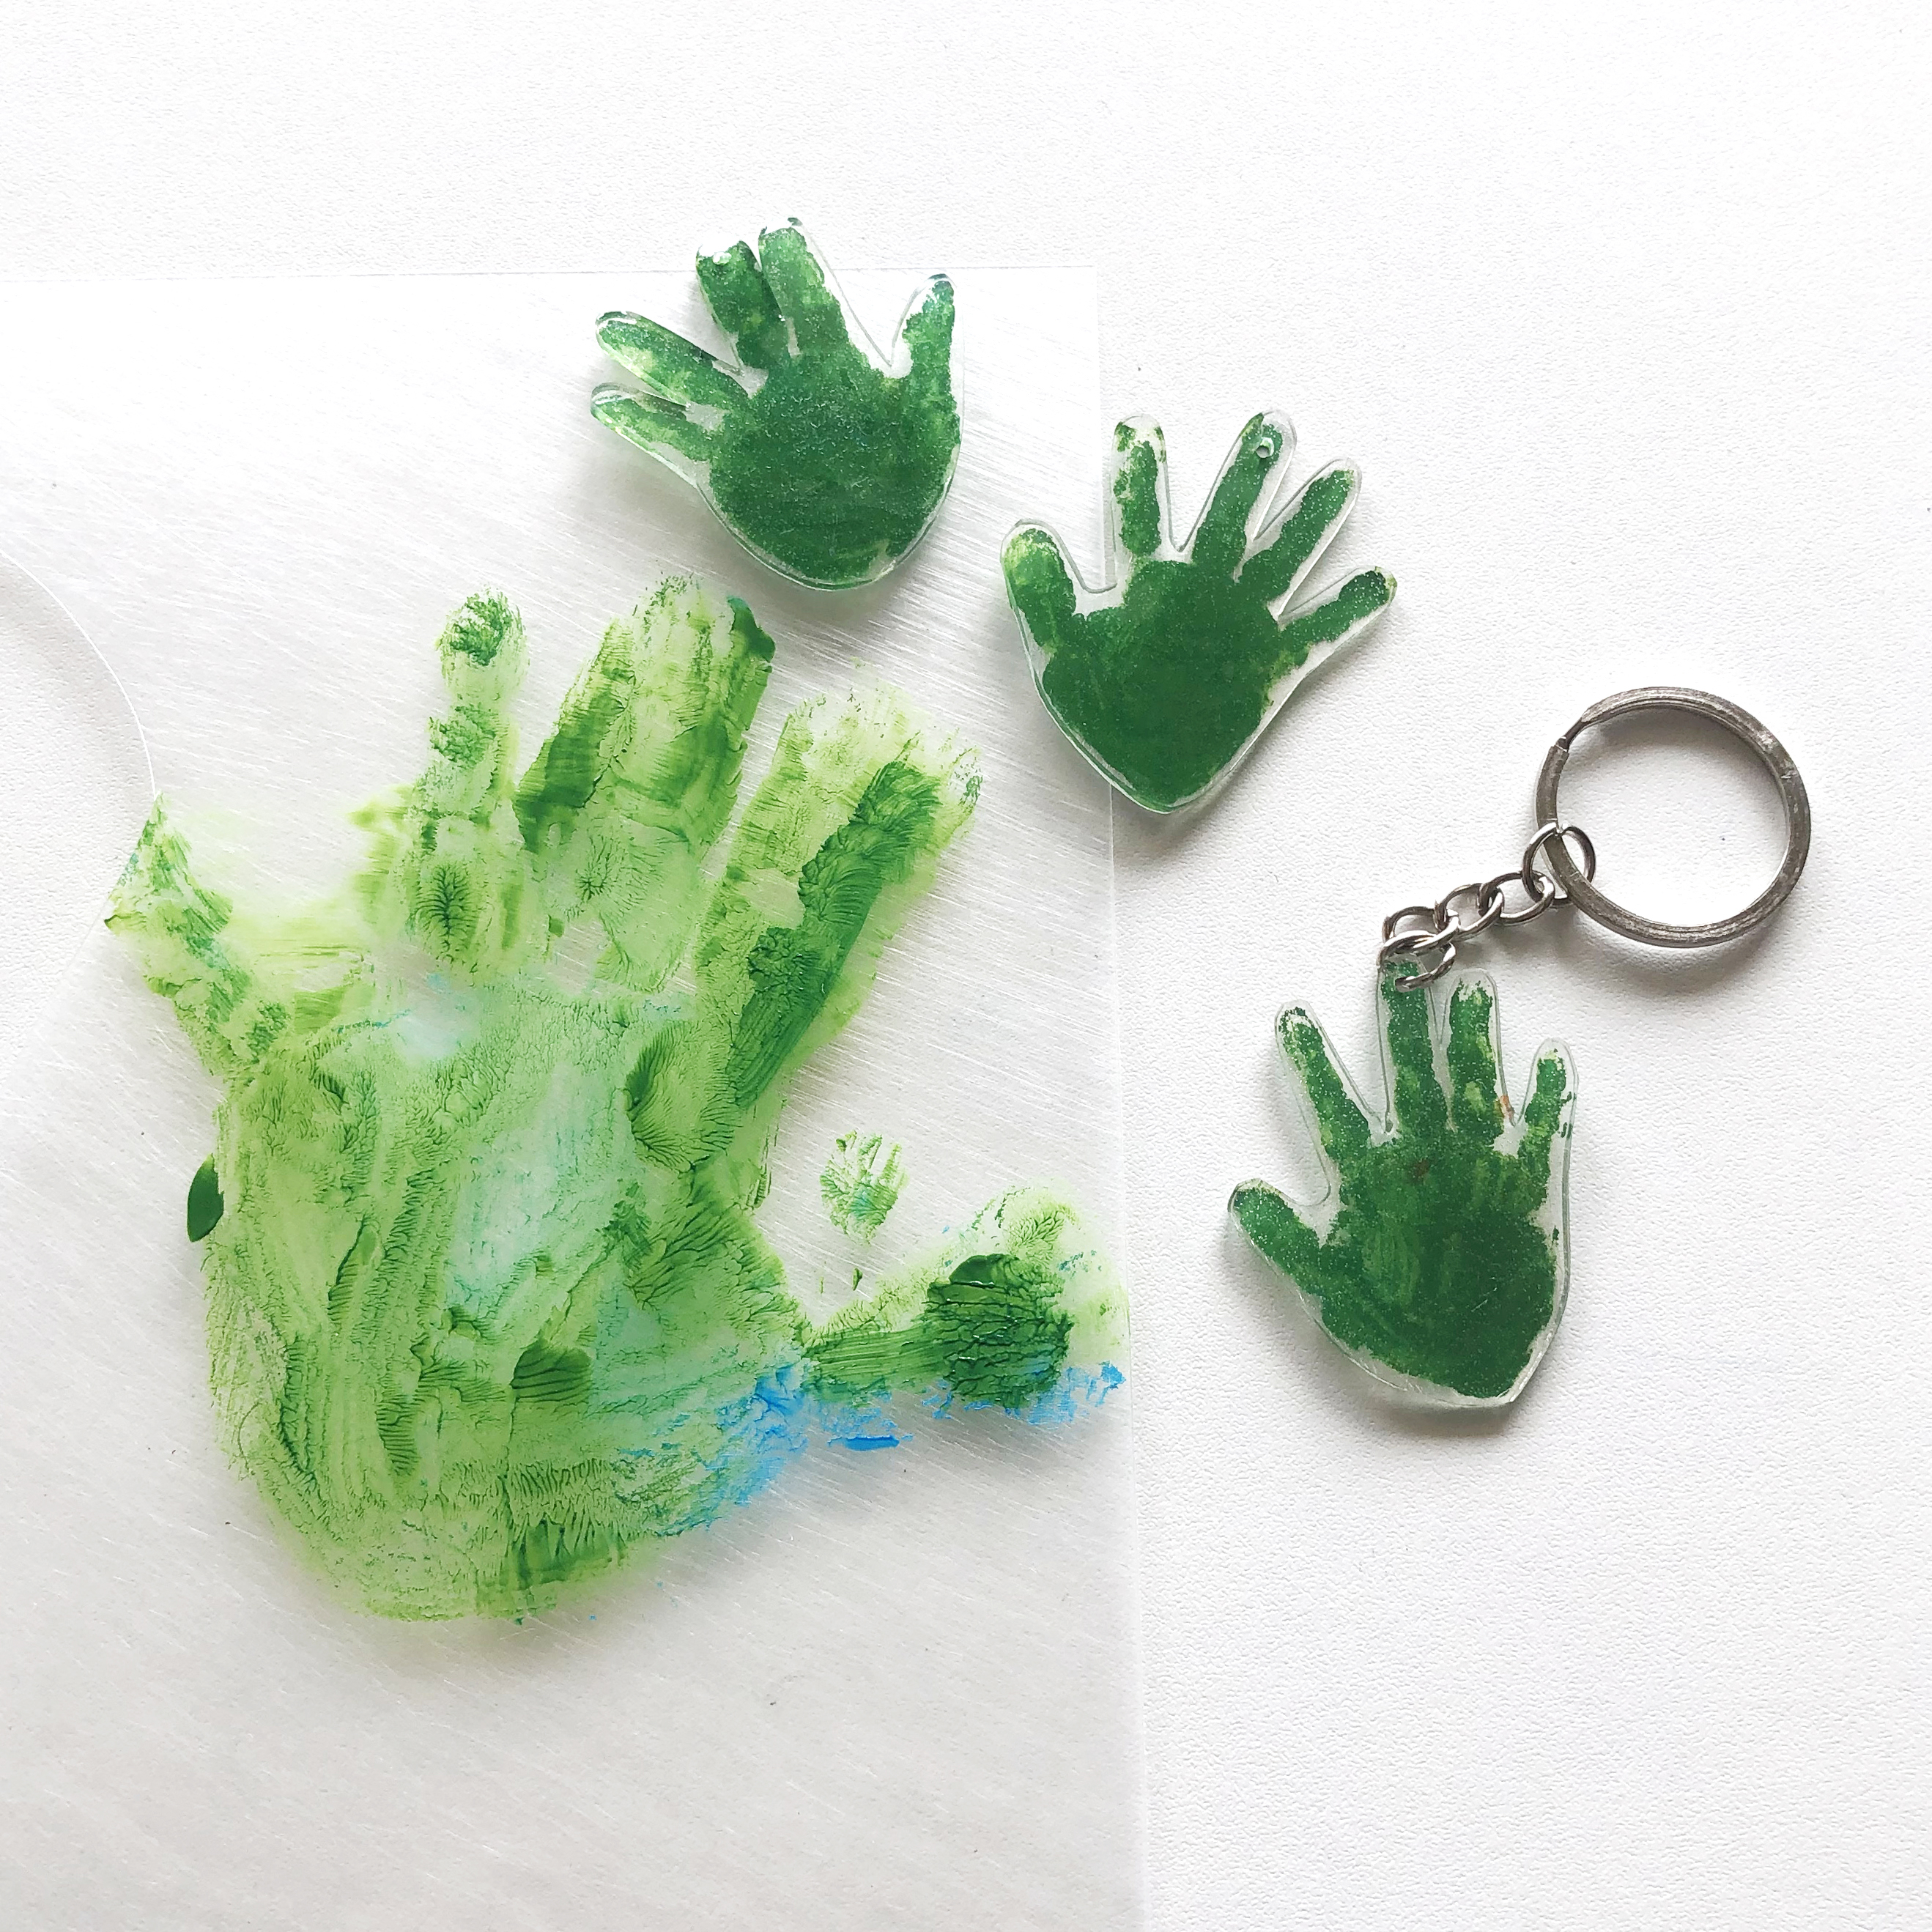
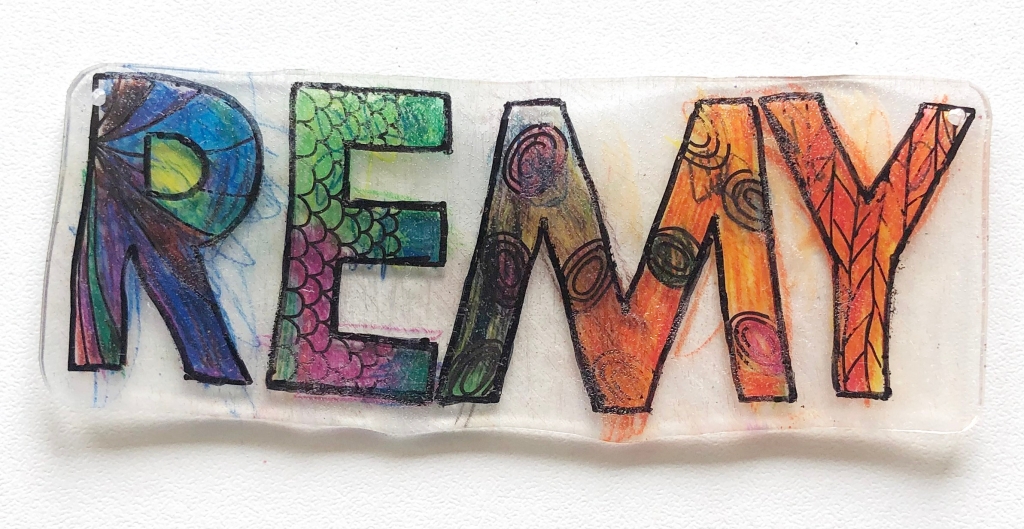
One of my favorite craft materials lately is shrink plastic (a.k.a. Shrinky Dink), which is a type of clear plastic (#6 to be exact) that once heated, thickens and shrinks to approximately half of its original size. It is great for making personalized crafts and gifts since we could essentially draw or trace any design on it.
The Dumpling and I have turned our plastic trinkets into wind chimes, ornaments, accessories, name tags, and key chains, just to name a few.
Original (left) vs. shrunken (right)A name tag for the Dumpling’s book bag. An Easter-themed wind chime.
Color pencils, permanent markers, or acrylic paint
Oven safe tray
Oven mittens
Hole punch (optional)
Clear nail polish (optional)
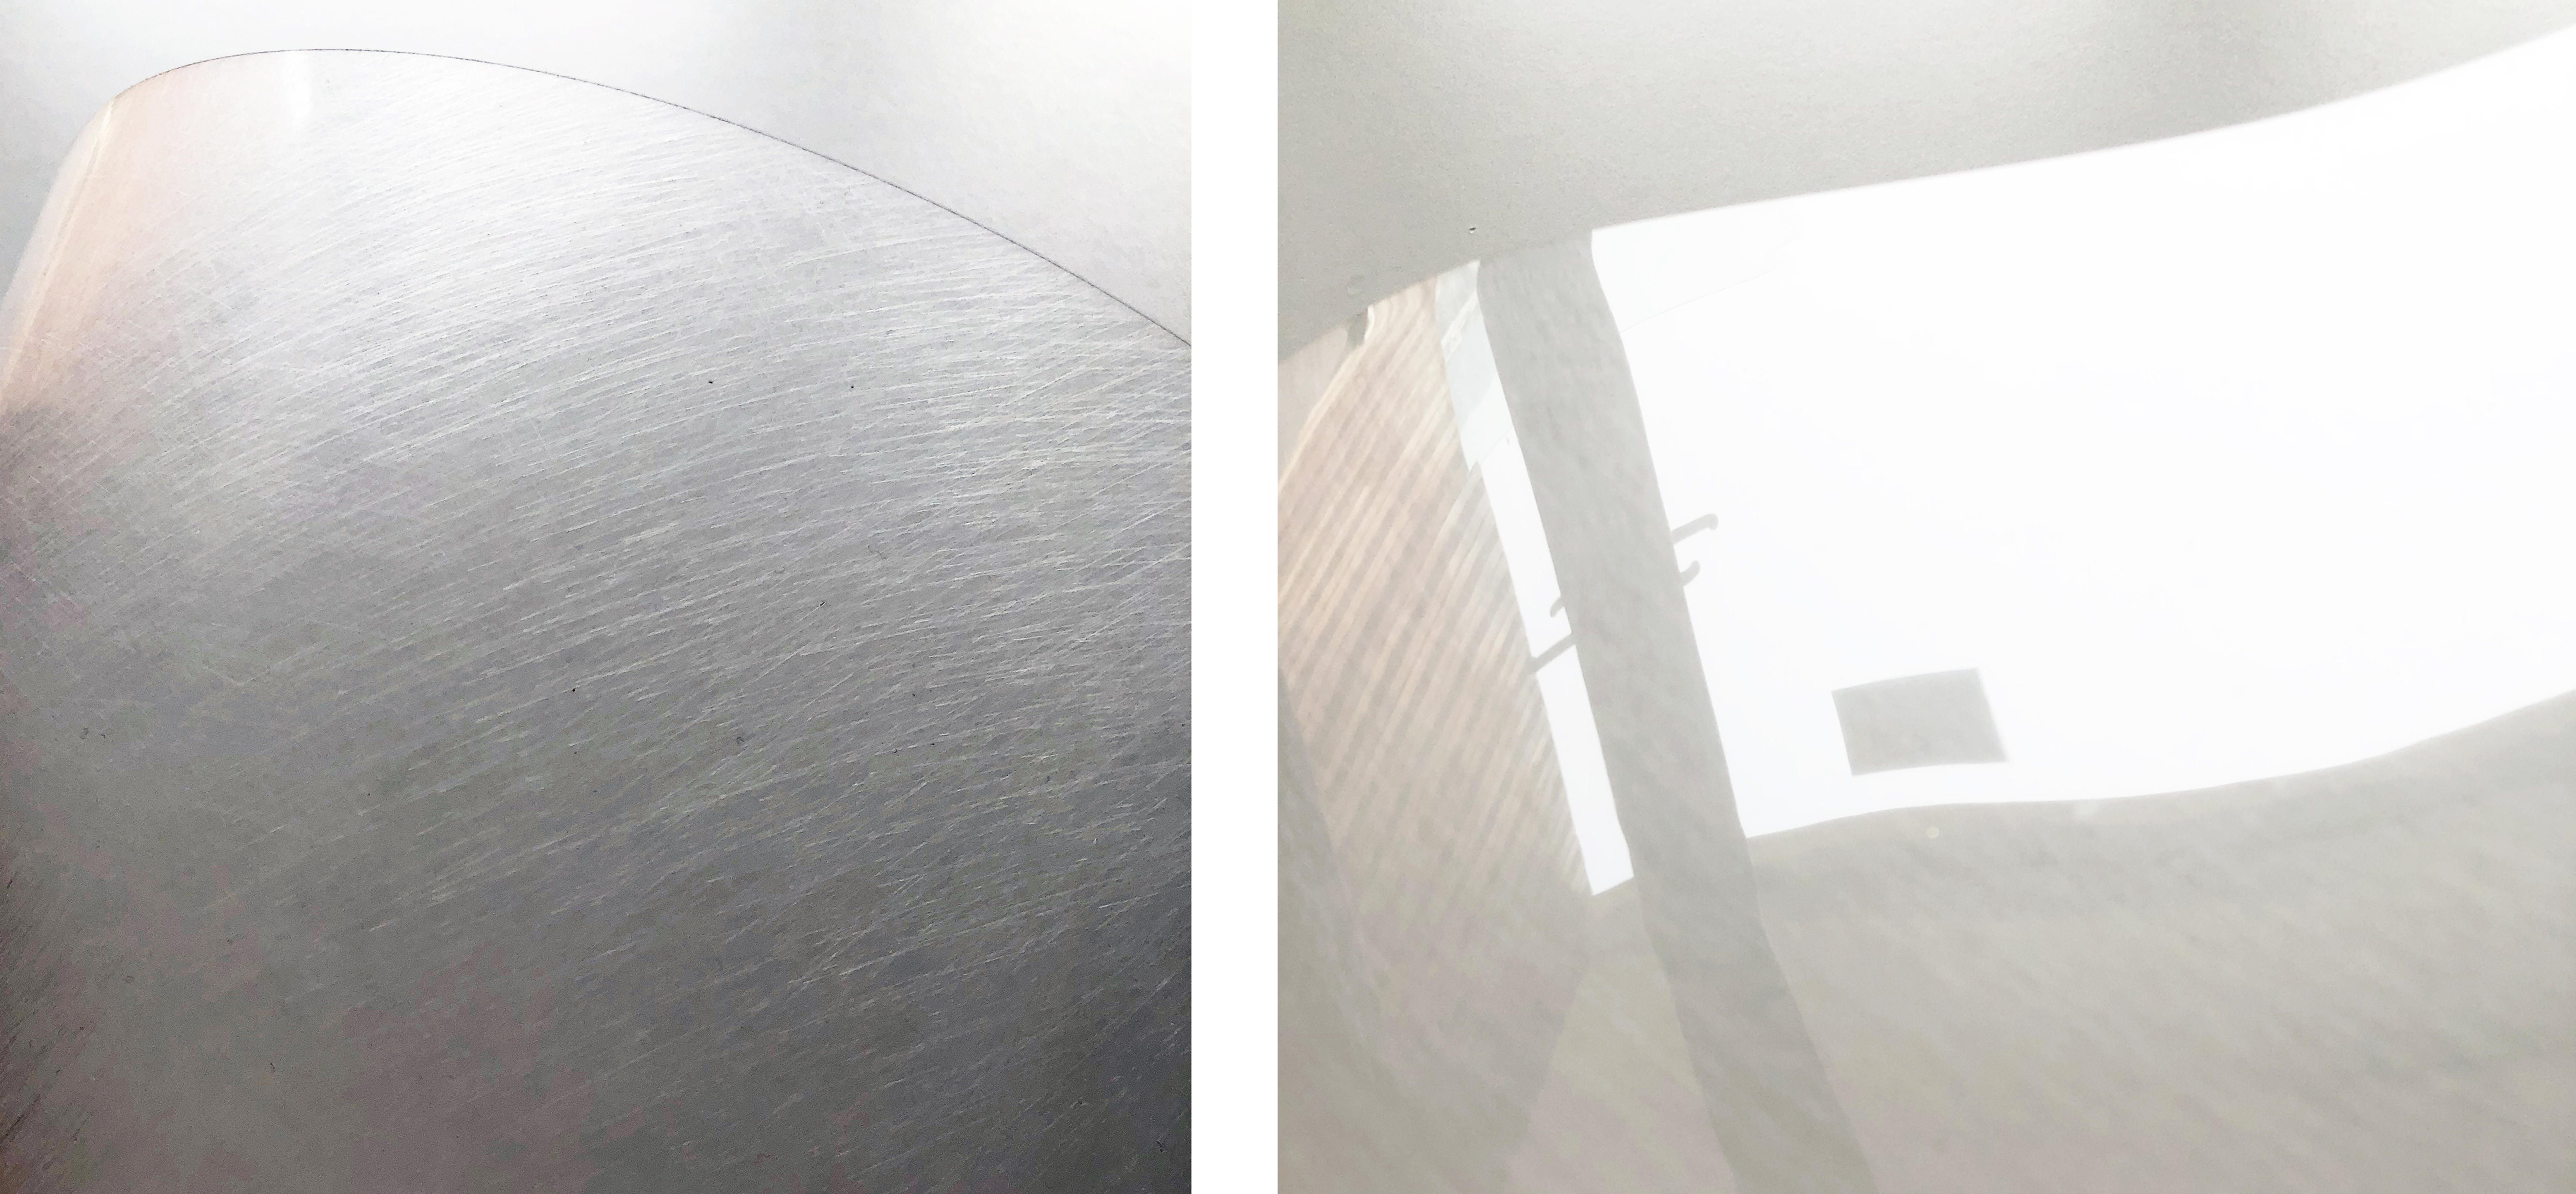
Draw or trace your image onto the smooth side of shrink plastic sheet with permanent marker. My sheets came pre-sanded on one side and smooth on the other, so check carefully. Size the images accordingly as they shrink to half of their original size once heated.
Sanded side (left) vs. smooth side (right)Trace or draw on smooth side. I have a Q-tip dipped in rubbing alcohol ready on the side to wipe away small smudges or mistakes.
Color on the sanded side of the plastic. Flip the sheet over and color on the sanded side — the rougher surface makes it easier for the pigments to grab on. Coloring on this side also ensures that the color doesn’t cover the design outline.
Color on sanded side. The colors may look light, but they darken slightly once heated.
Cut along the outline. Be gentle as plastic can rip easily.
Punch hole(s) on where you want to string the shrink plastic.
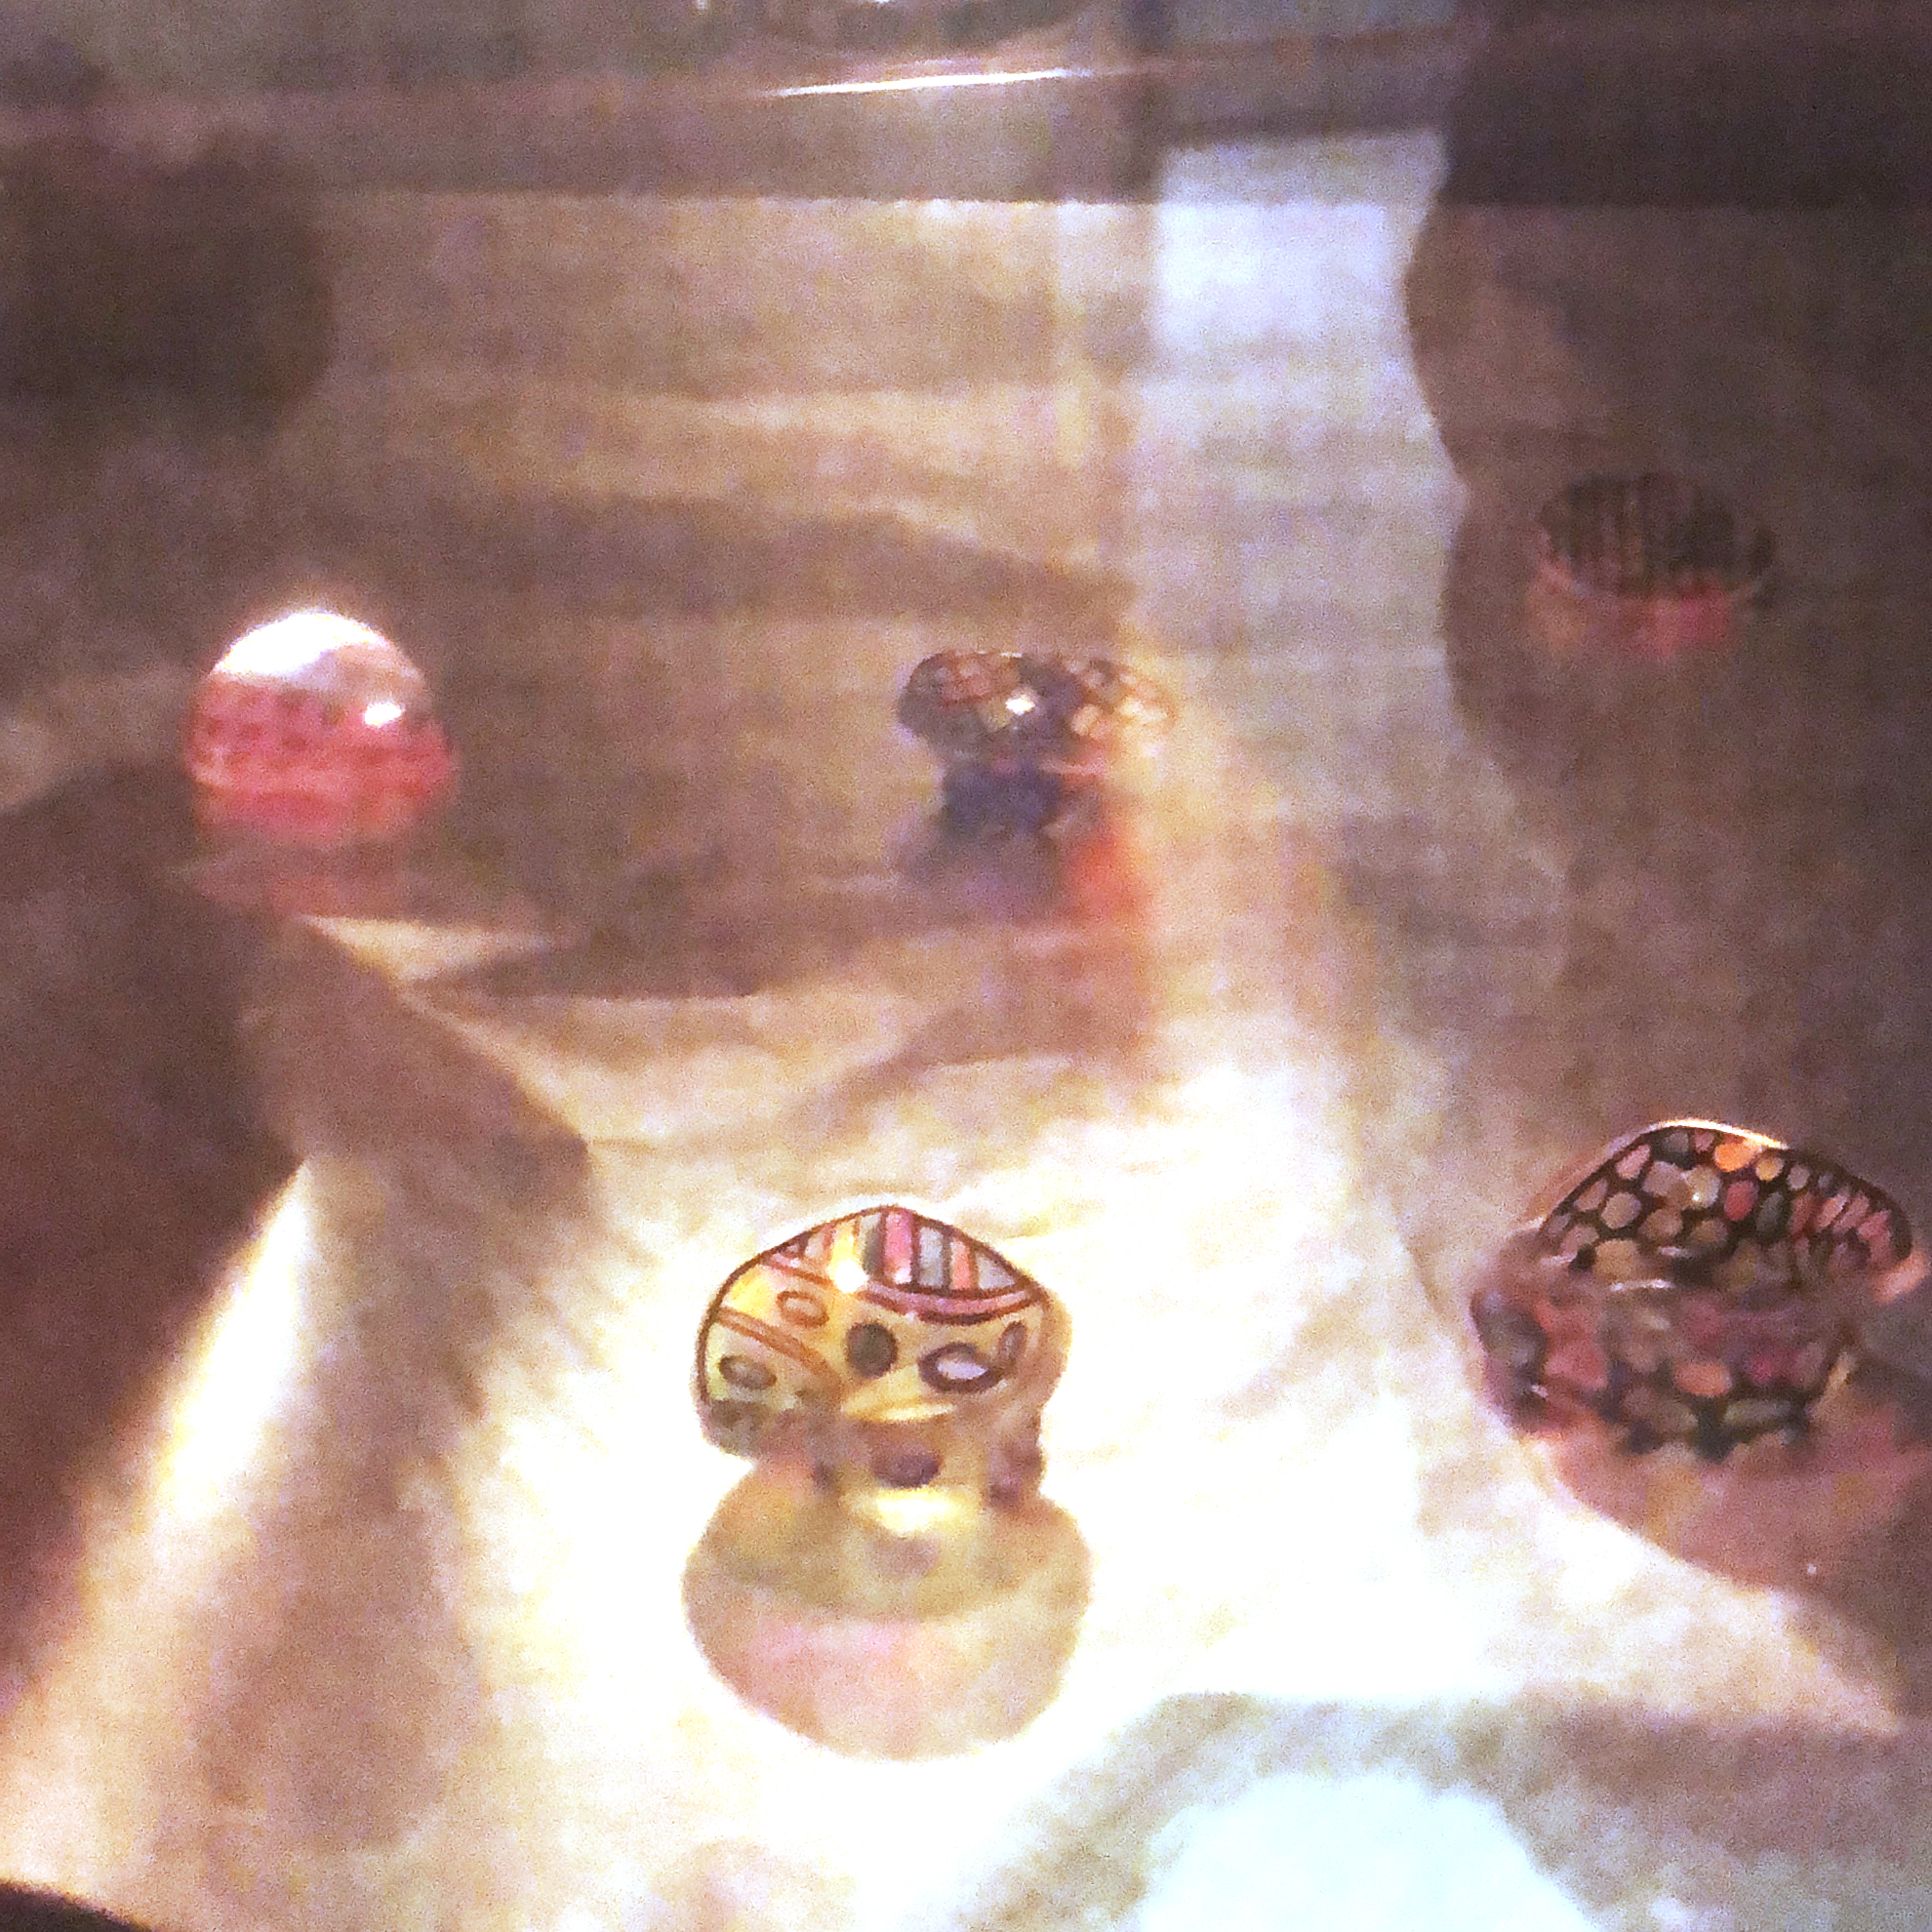
Pre-heat oven to 175°C and then bake cutout for approximately 3-5 minutes in oven-safe tray. The funnest part of this activity is watching the plastic curl and then flatten into a miniature version of itself. The first time I did this, the cutout did not flatten properly — my guess was that I did not wait for the oven to pre-heat to the right temperature, so be patient!
The plastic curls and shrinks to approximately 50% of its original size in the oven!
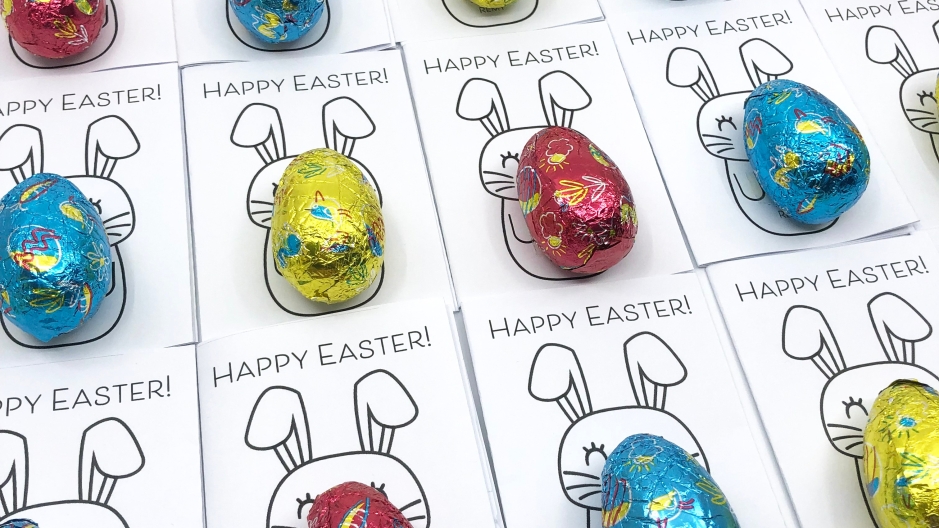
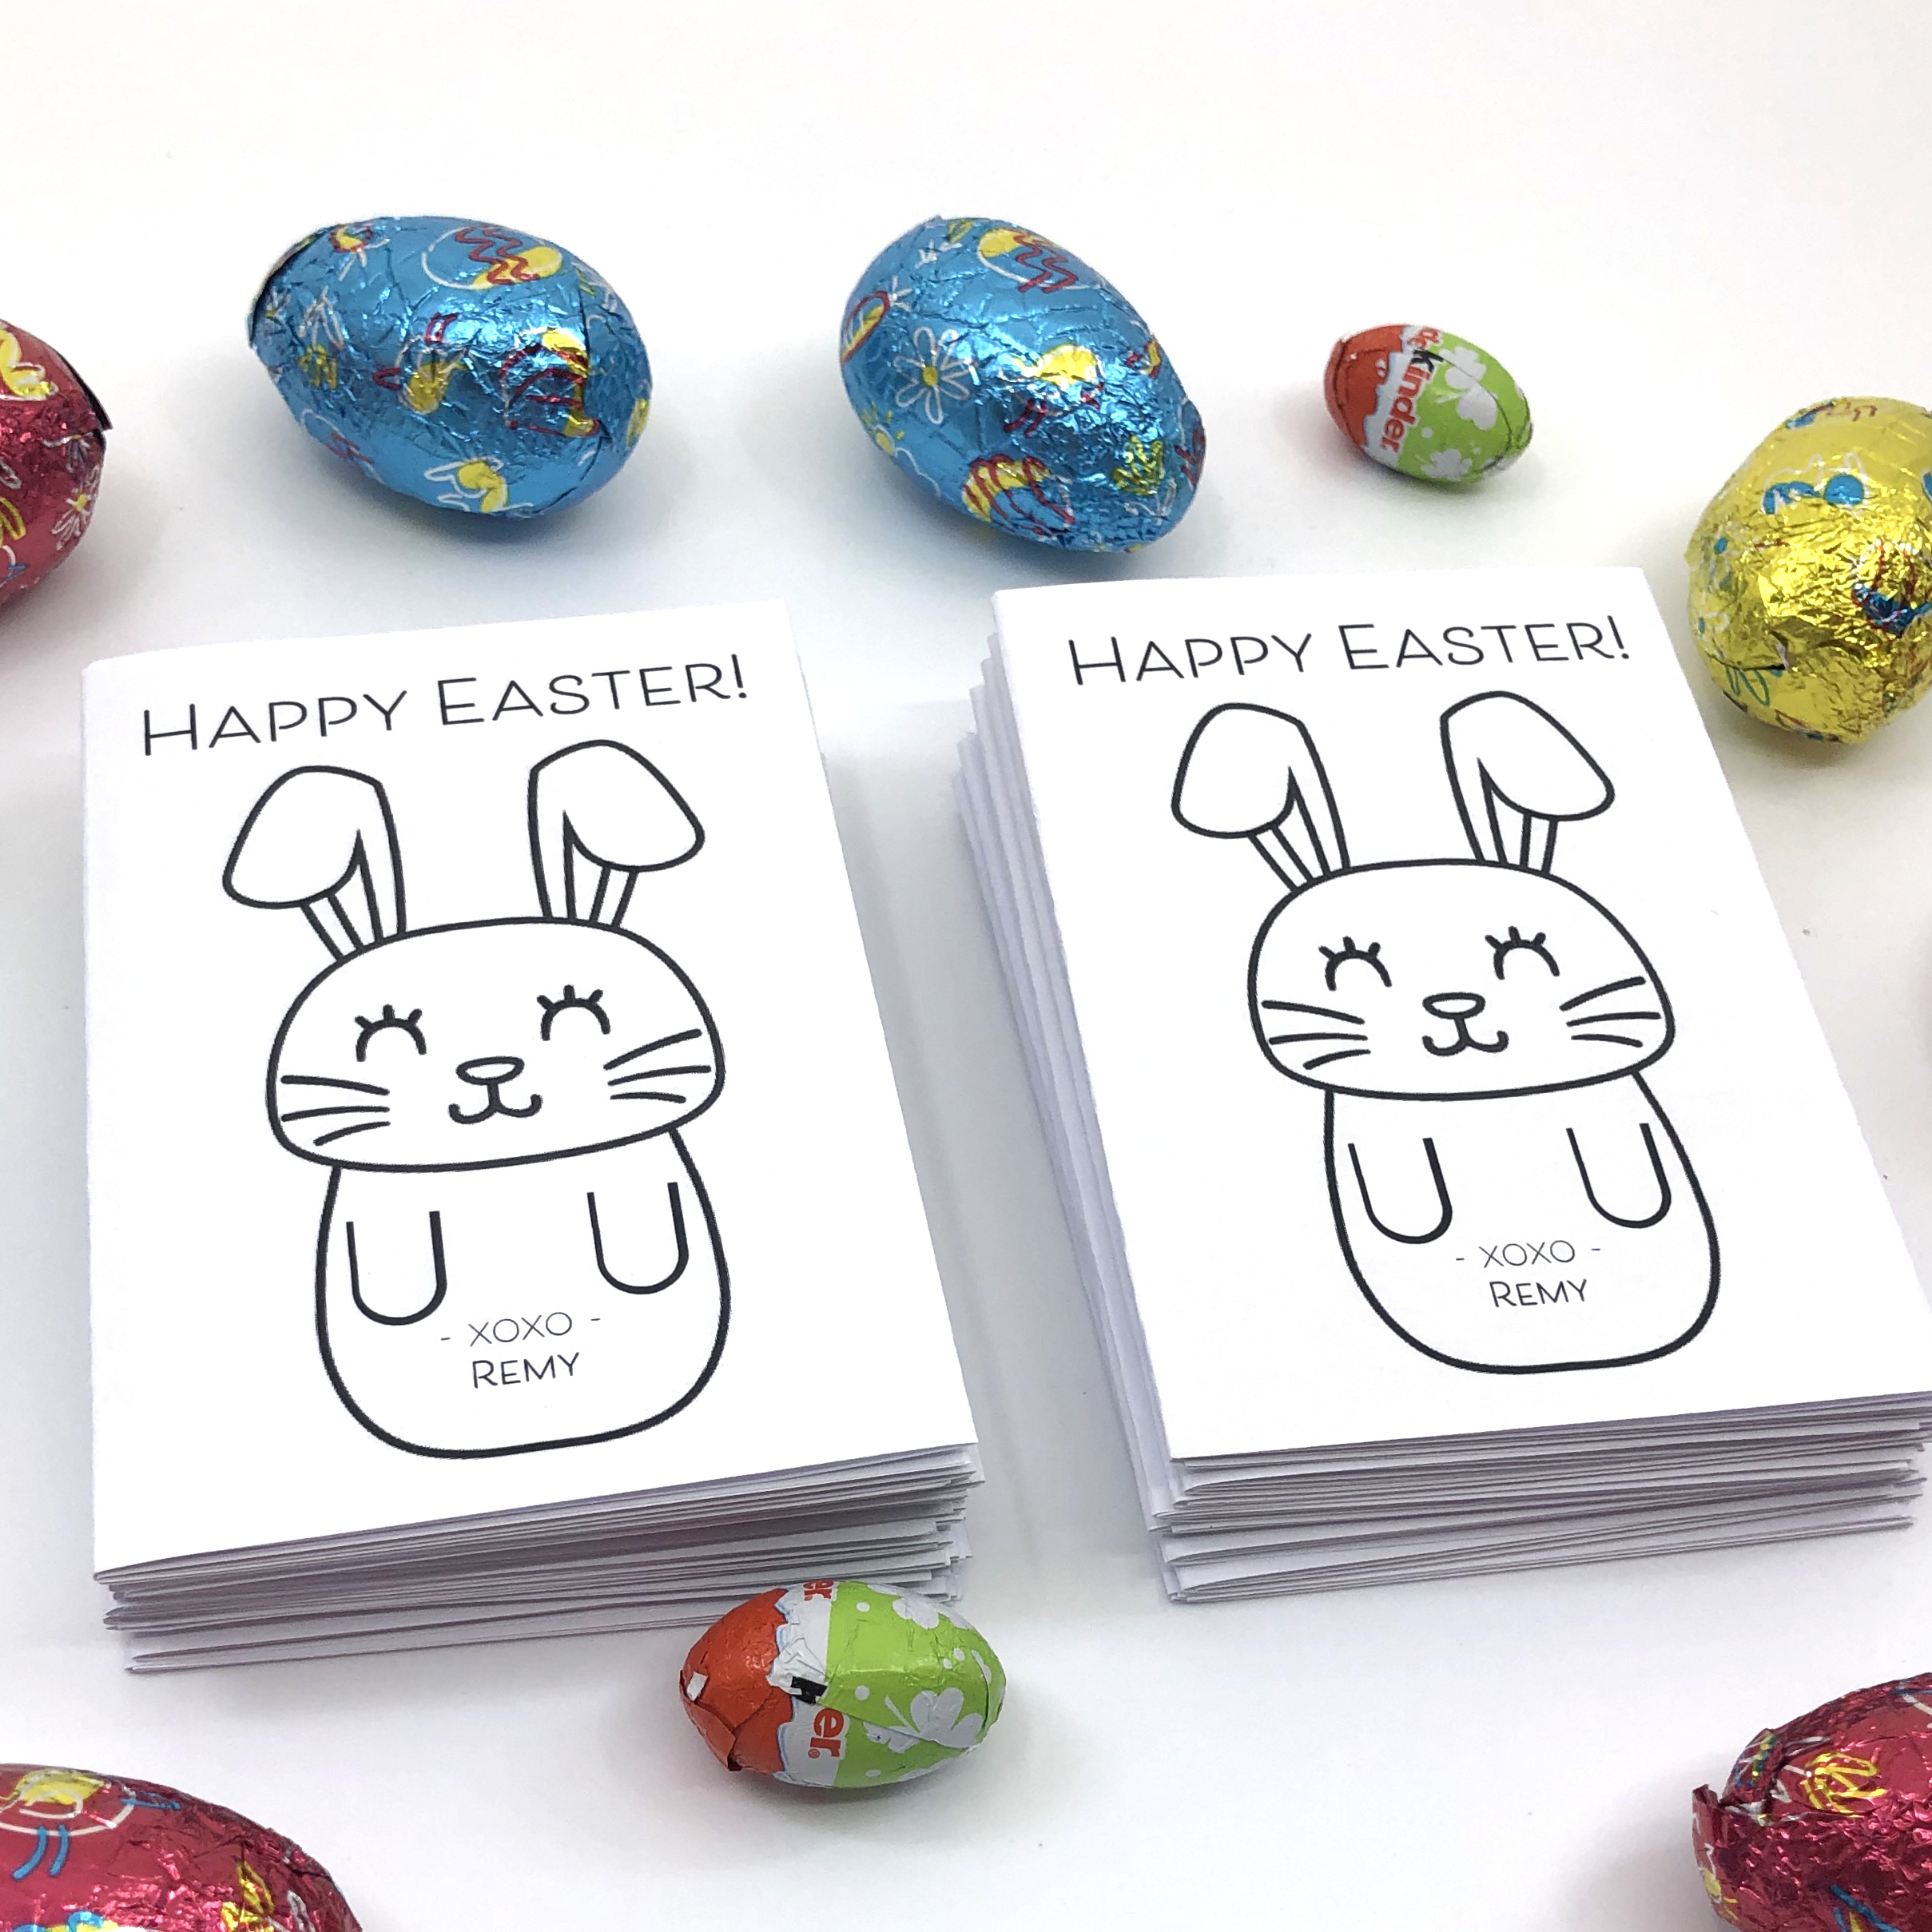
For the Dumpling’s school Easter party, I made a mini activities book that I am sharing as a free printable. I love using this template because the book is printed single-sided on a regular piece of copy paper and is assembled without any gluing or binding — just fold and cut.
The content is appropriate for pre-schoolers and kindergartners with adult guidance.
Print. Under the print options, select “Fit” under the Page Sizing section. This ensures that no matter what size paper you’re using (whether A4 or Letter), the entire image would be scaled appropriately to fit within the print area.
(Confession: I actually forgot this step and my books came out slightly cut off on the edges.)
Fold and cut. Cut along the solid lines and fold along the dotted lines according to the guide below. Remember to trim the rectangular border on the perimeter of the sheet as well.
The Dumpling’s kindergarten is throwing a birthday party for all November babies at the end of the month. Since she’s one of the birthday kids, I wanted to do something extra. So along with treats, I also made her classmates a coloring activity book as a party favor that I’m sharing as a customizable printable!*
The book is super easy to make because it’s printed single-sided on a regular piece of copy paper without any gluing or binding. While the customizable version provides the option to include a short message, I have also made a generic version with a simple “Happy Birthday” on the cover. The content is suitable for pre-schoolers and kindgardeners.
Materials
Coloring book printable* (click to download the customizable or generic template)
Scisscors
Customize the cover text in Adobe Reader (skip if using the generic template )
Open up the PDF file in Adobe Reader and click on the form fields (highlighted in blue) to edit the text.
Print. Prior to hitting the print button, select “Fit” under the Page Sizing section. This ensures that no matter what size paper you’re using (whether A4 or Letter), the entire image would be scaled appropriately to fit within the print area.
Trim the page border. Although this step might look extraneous, it ensures that all your pages will be of equal size.
Fold and Cut.
I managed to whip out 20 of these within the hour…mom-life is hard work!
* Please note that the two graphic elements in the template are different than the version featured in the video—the font used on the cover and the balloon design on the letter tracing spread.
In what felt like a blink of an eye, the Dumpling turned three last week. It was the first year that she understood what a birthday is, and ironically, it was also the first time I didn’t throw her a party. (My rationale was a bit complicated—something to do with me no longer feeling guilty about us not spending enough time together.) Instead we did a few birthday-themed activities leading up to the big day and took a family trip to Disney Hong Kong for the grand finale.
Blowing “candles”
The Dumpling’s lungs got a workout as she practiced blowing out pretend candle made out of marker caps. We even played a bit of “air bowling” by arranging the caps like bowling pins and trying to knock them all down in one huff.
Scrap Paper Cake
We used pieces of scrap paper that were cut into varying lengths to build our first cake. I even managed to sneak in a numbers exercise by labeling the strips 1-10 and asking the Dumpling to glue them in chronological order.
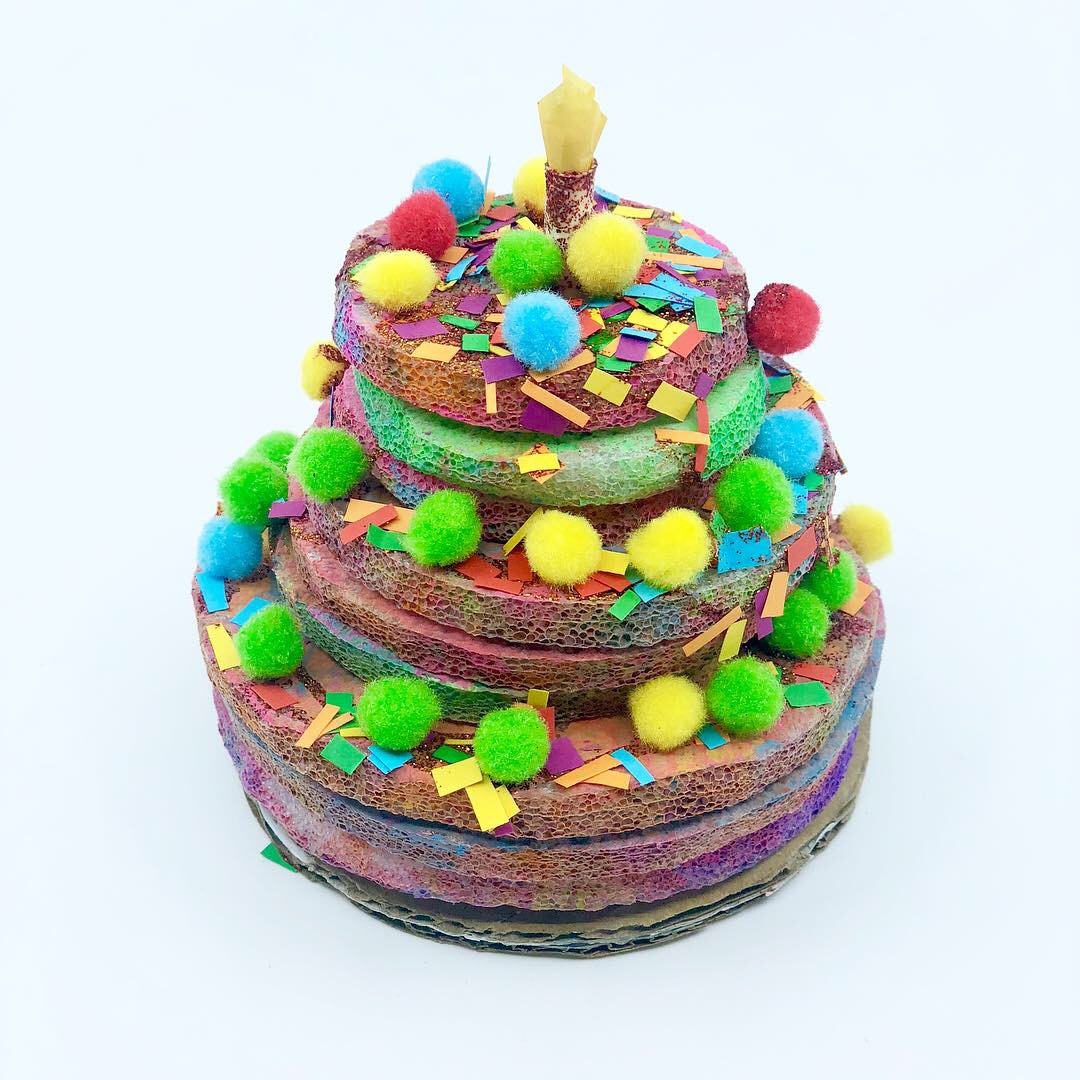
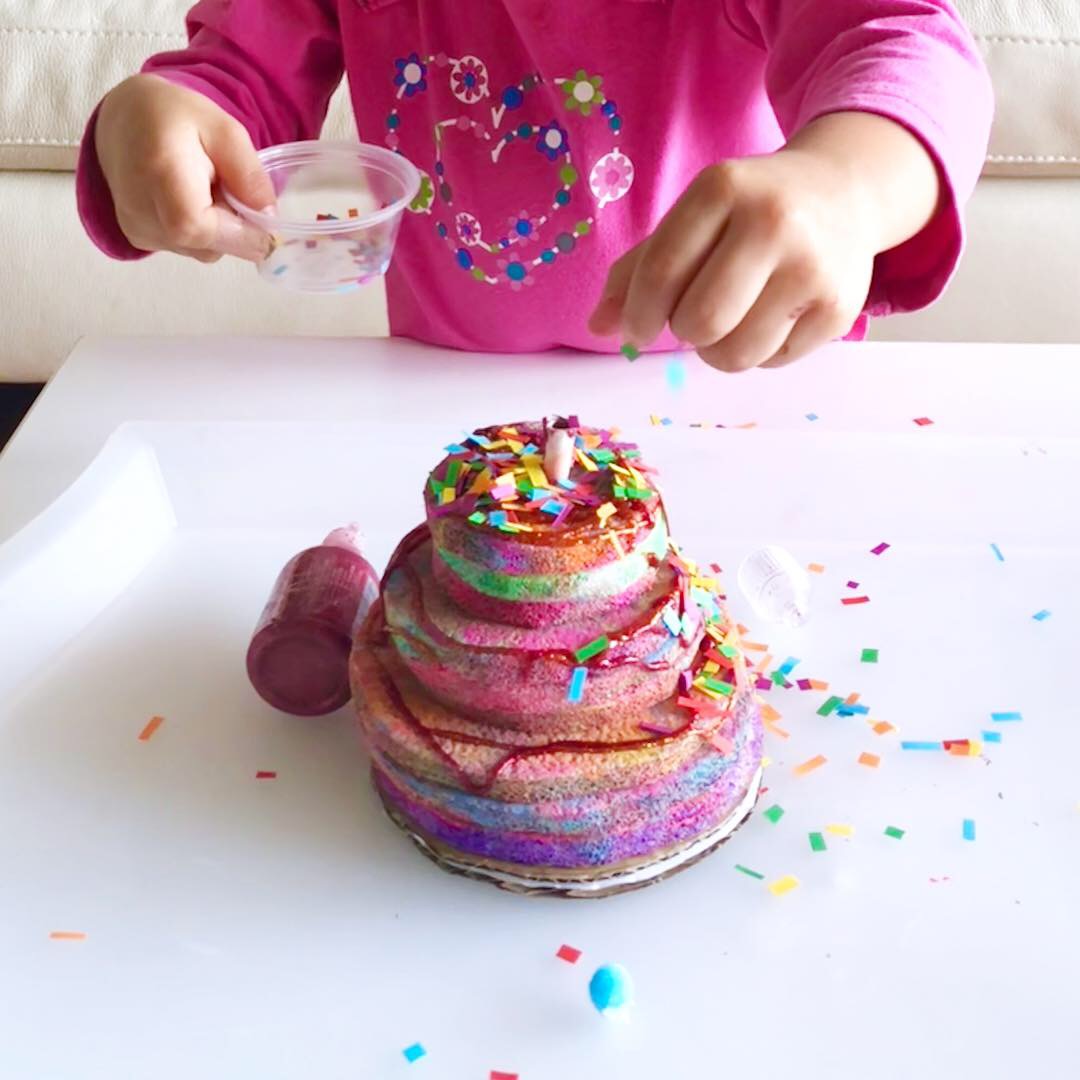
3D Styrofoam Cake
For our second cake, we painted styrofoam circles and stacked them to create a 3D layer cake.
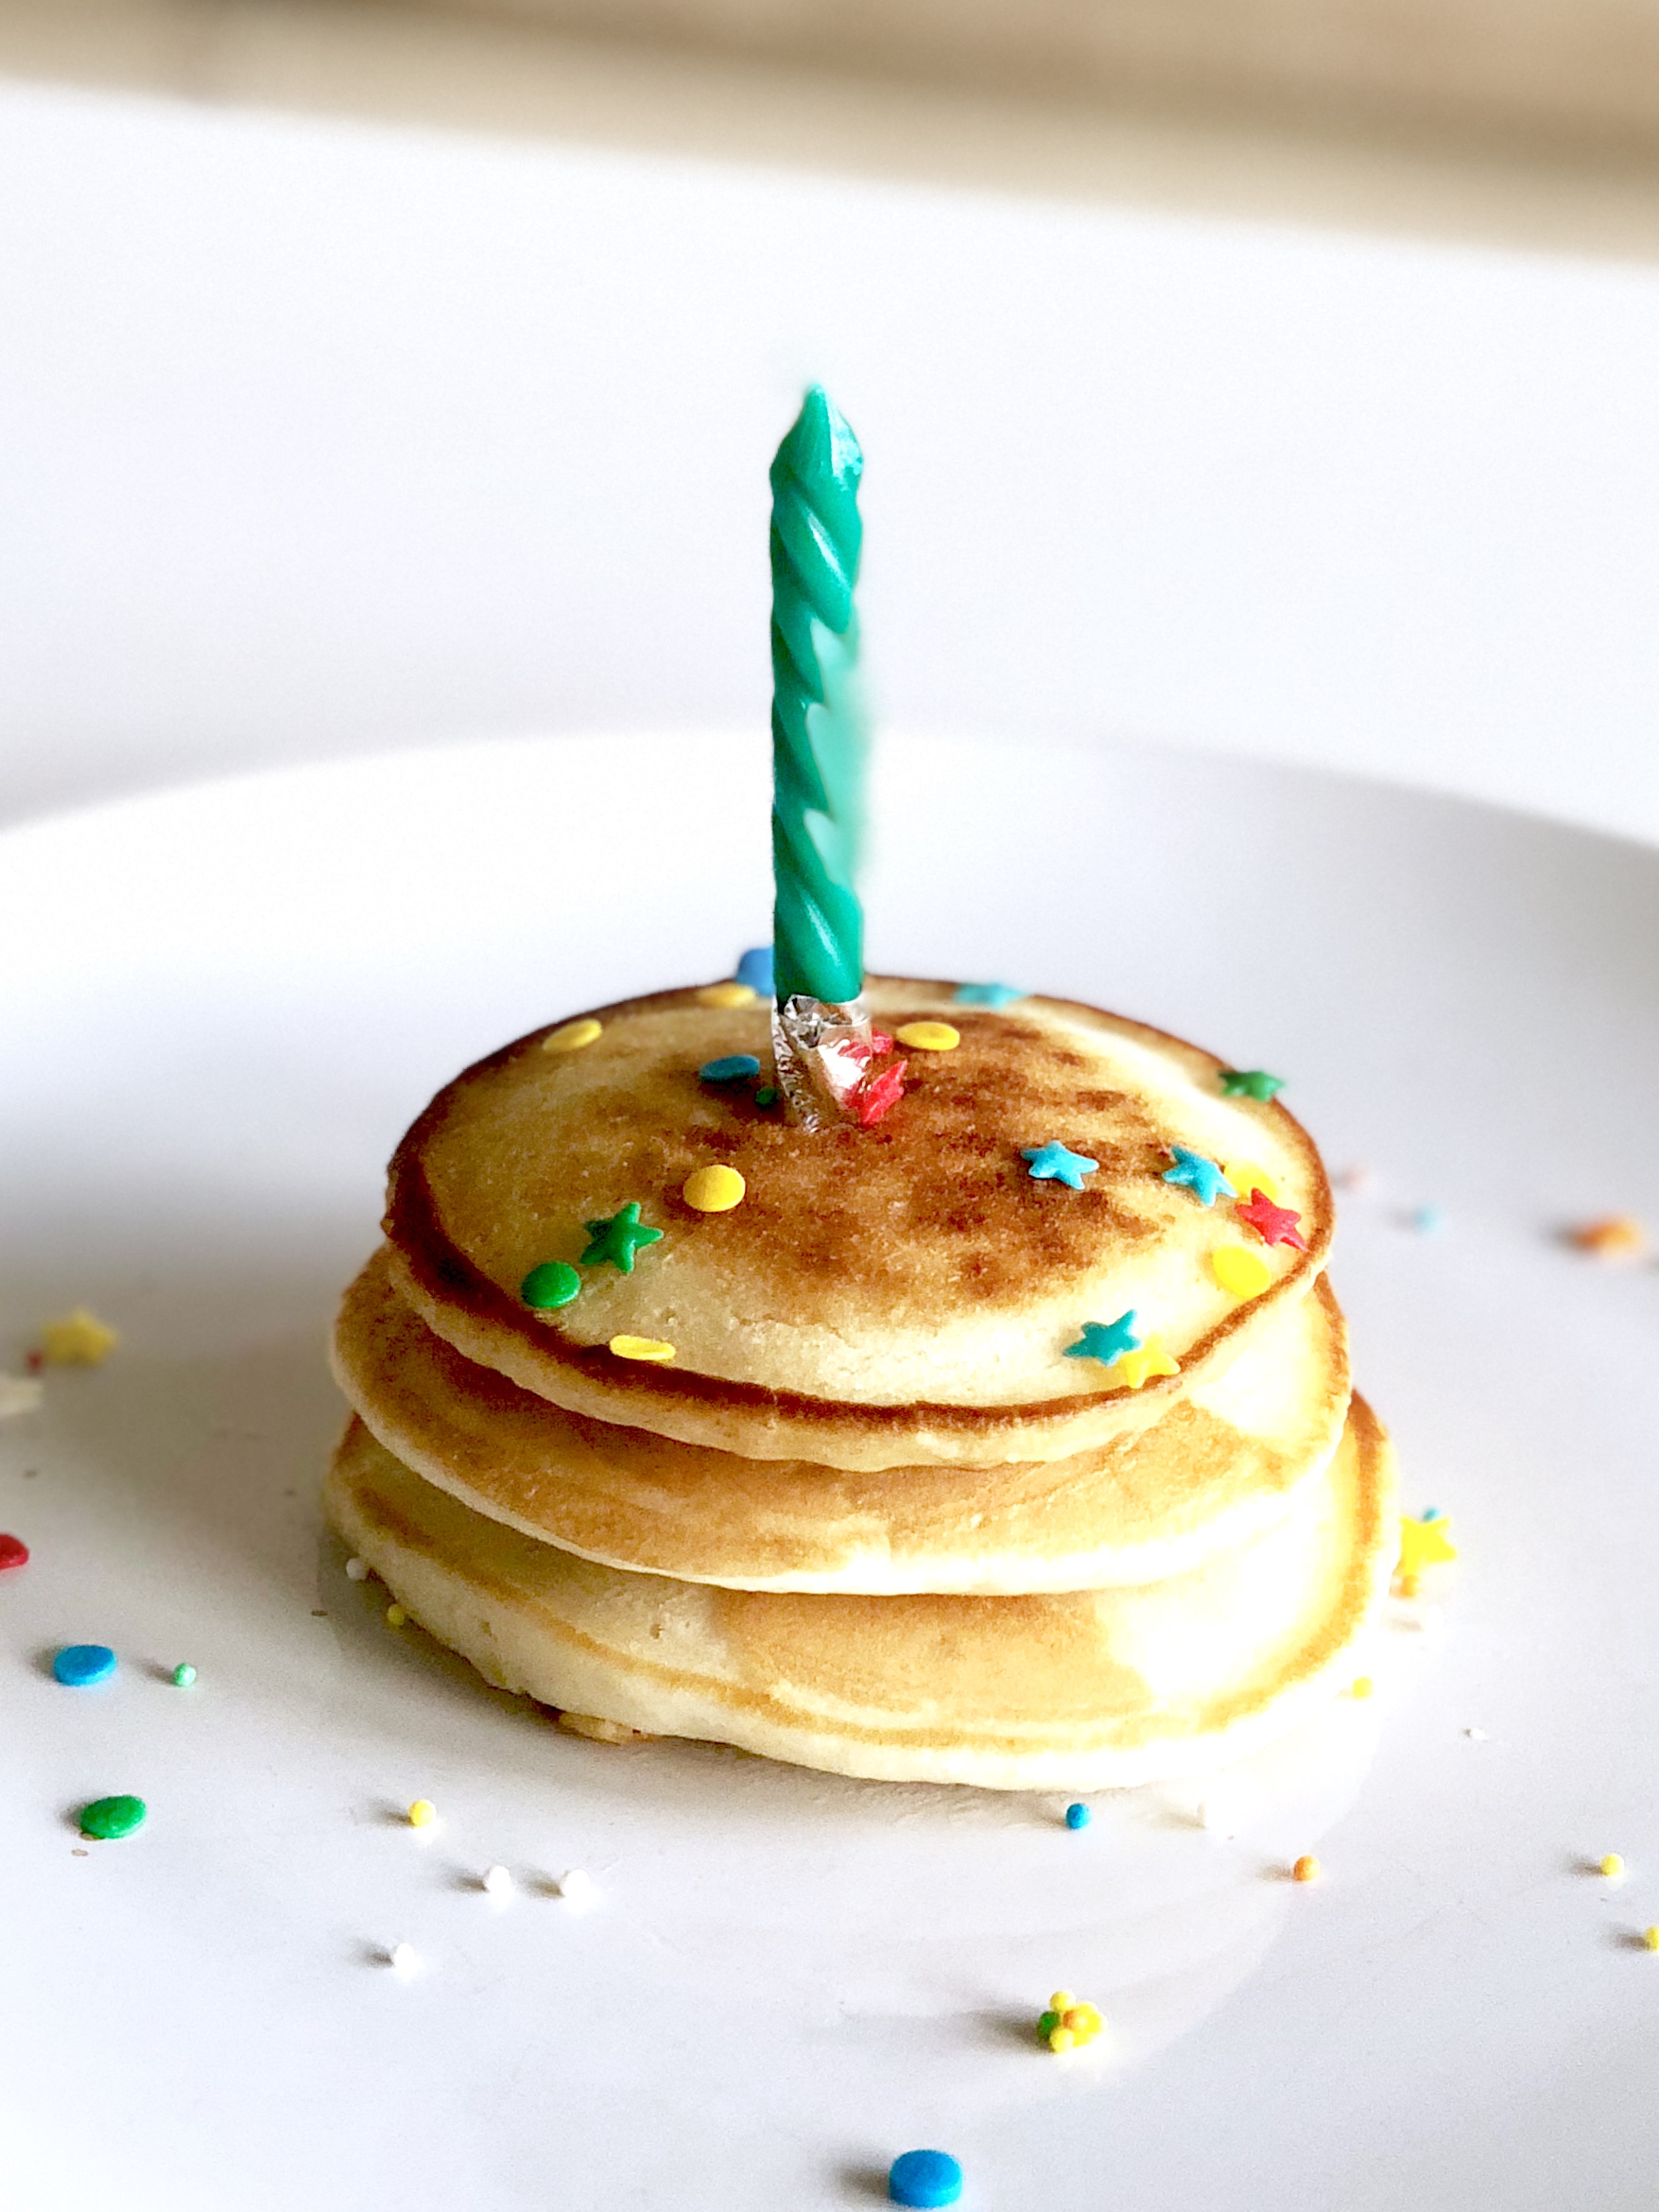
Birthday Breakfast of Champions
On the morning of the Dumpling’s birthday, I made her favorite breakfast food—pancakes. I added a candle because pancake is a cake…right? Those candle blowing exercises paid off because she kept blowing the candle out before I could snap a picture!
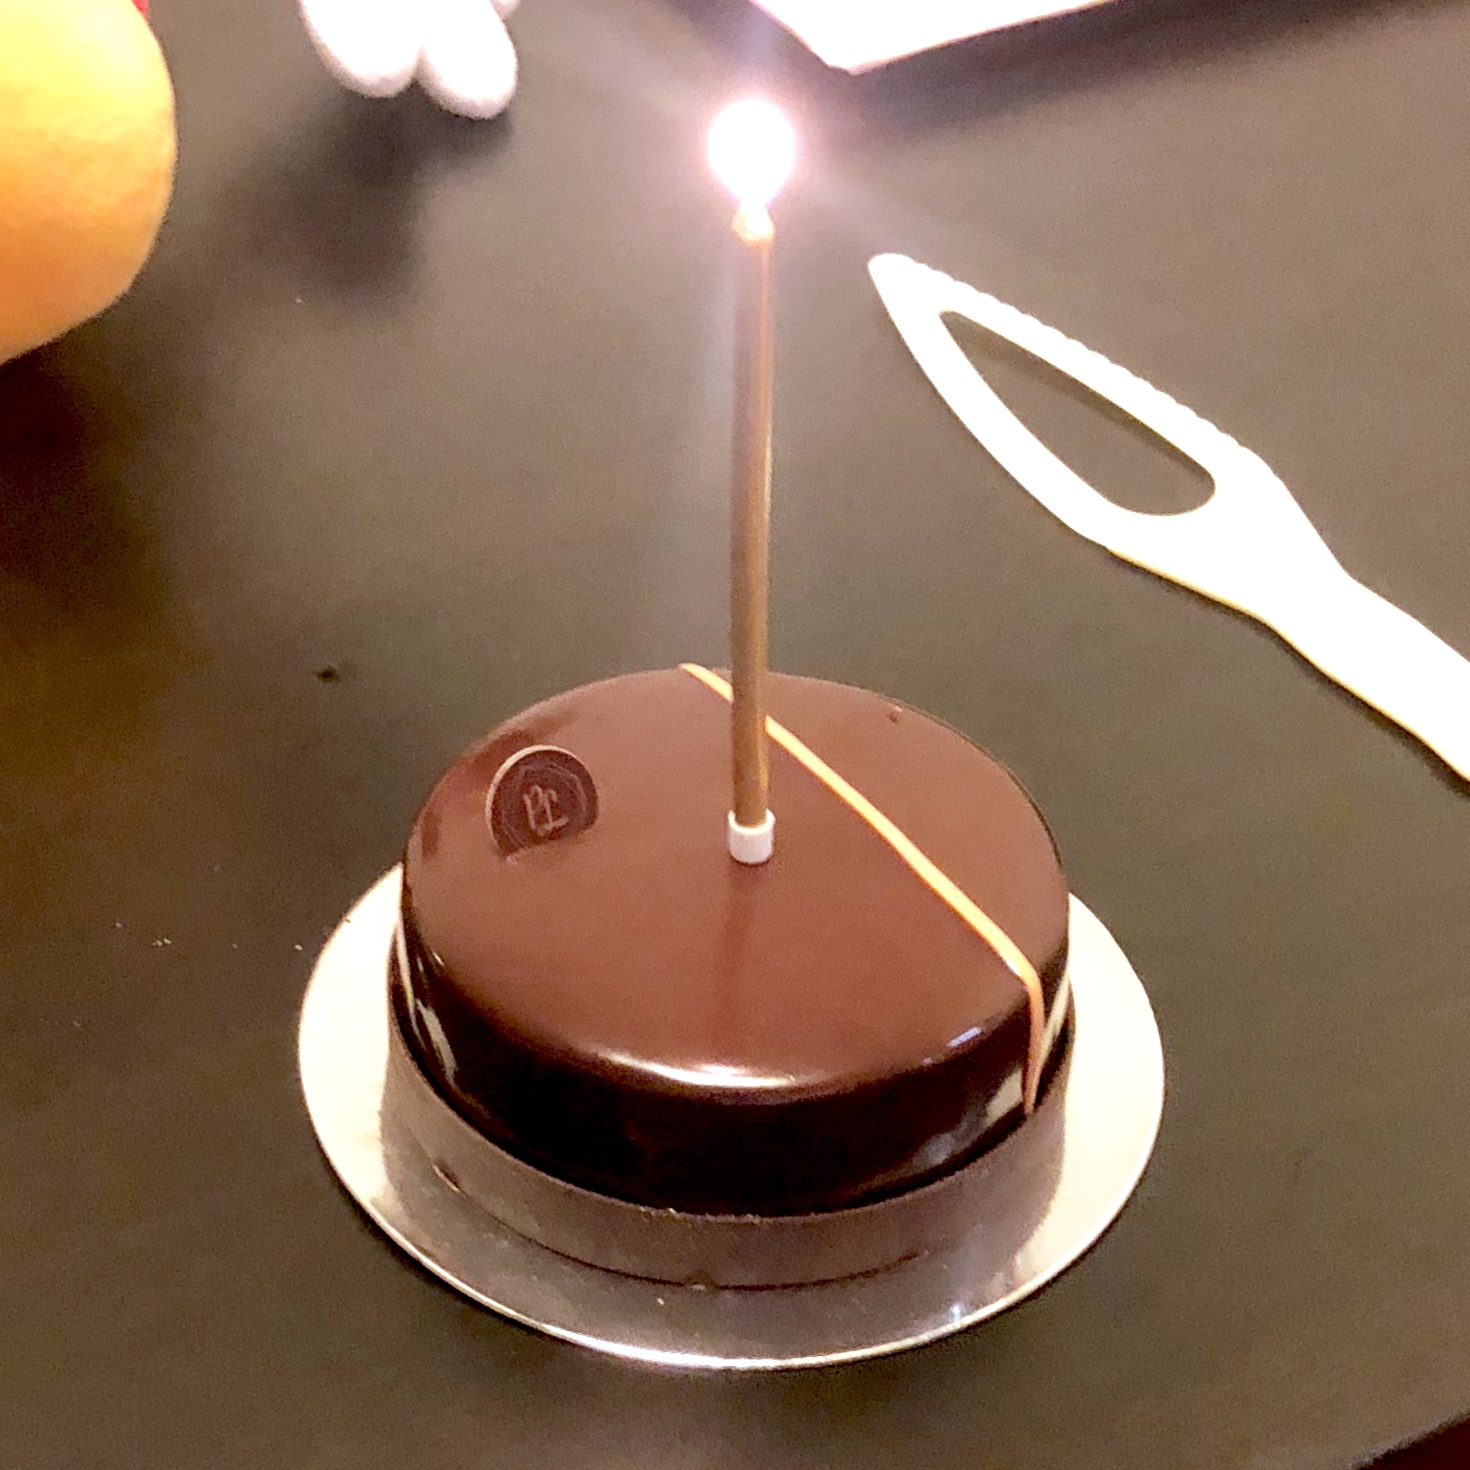
The actual birthday cake
The Dumpling wanted a chocolate cake, so I asked jigg to pick up something cute at Harbour City since the selection is somewhat limited in Discovery Bay. While I was expecting cartoon characters, he came home with this chic gourmet dark chocolate cake from Paul Lafayet. Even though the Dumpling gobbled it up, I think jigg and I need to recalibrate our definition of “cute” in the future.
Disney Hong Kong
Despite talking about going to Disney for months, the Dumpling was absolutely miserable when we got there. She only smiled on the “Small World” ride and was Miss Grumpy Pants the rest of the time. Womp womp.
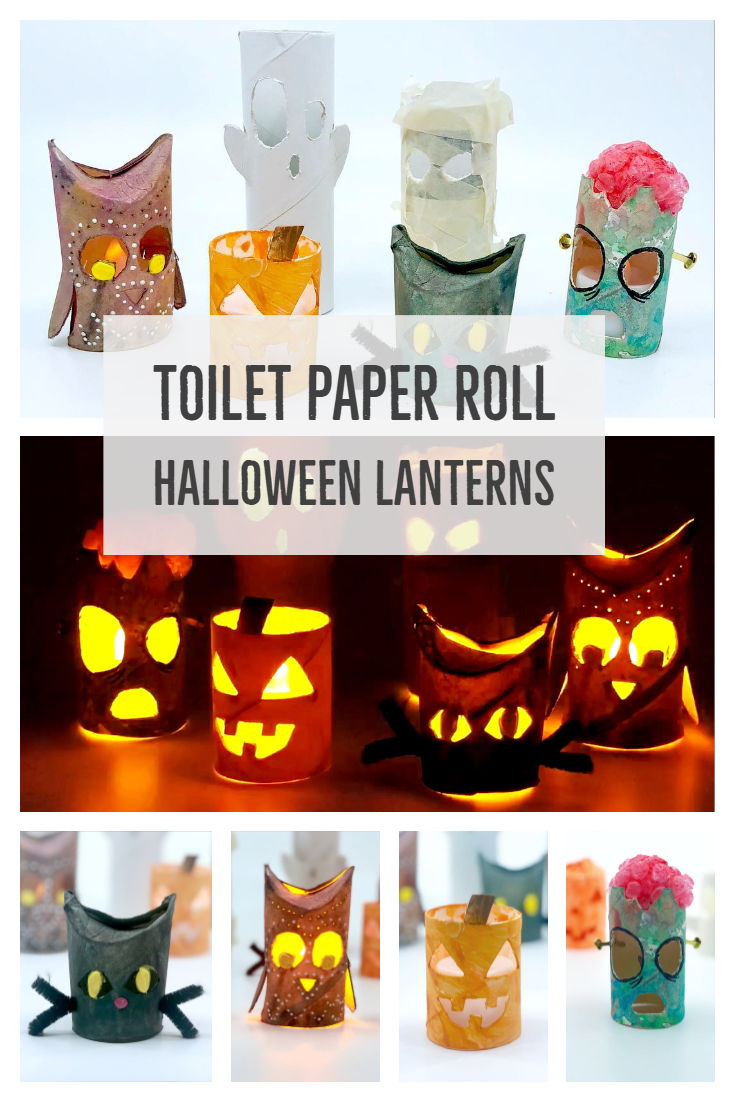
Did you know that toilet paper rolls in Hong Kong are white, not cardboard brown like they are in the U.S.?! This is a game changer for a crafter like me because the rolls are essentially perfectly primed canvases.
I had a half a dozen toilet paper rolls saved up that were itching for a second life as pieces of art. A quick Google search for “toilet paper roll Halloween crafts” returned hundreds of great ideas—using these as my starting point, I turned my paper roll crafts into lanterns so they are cute creatures during the day, but spooky monsters at night!
Draw the eyes, noses, and/or mouths on the toilet paper rolls with a pencil and cut the shapes out with an X-Acto knife. The basic premise is to create openings so that light from the candle can shine through. To add additional designs, puncture small holes on the roll with a push pin—they can be anywhere, but a safe approach would be to follow the shapes of the eyes, mouths, etc.
Color in each creature (where applicable). The Dumpling and I used both watercolor and craft paint, but I found that watercolor latched onto our rolls better and didn’t flake off as much once they dried.
Ghost
Because my paper roll was already white, I pretty much left the ghost as is. The little ones can opt to glue on cotton balls or strips of white tissue paper as additional decoration.
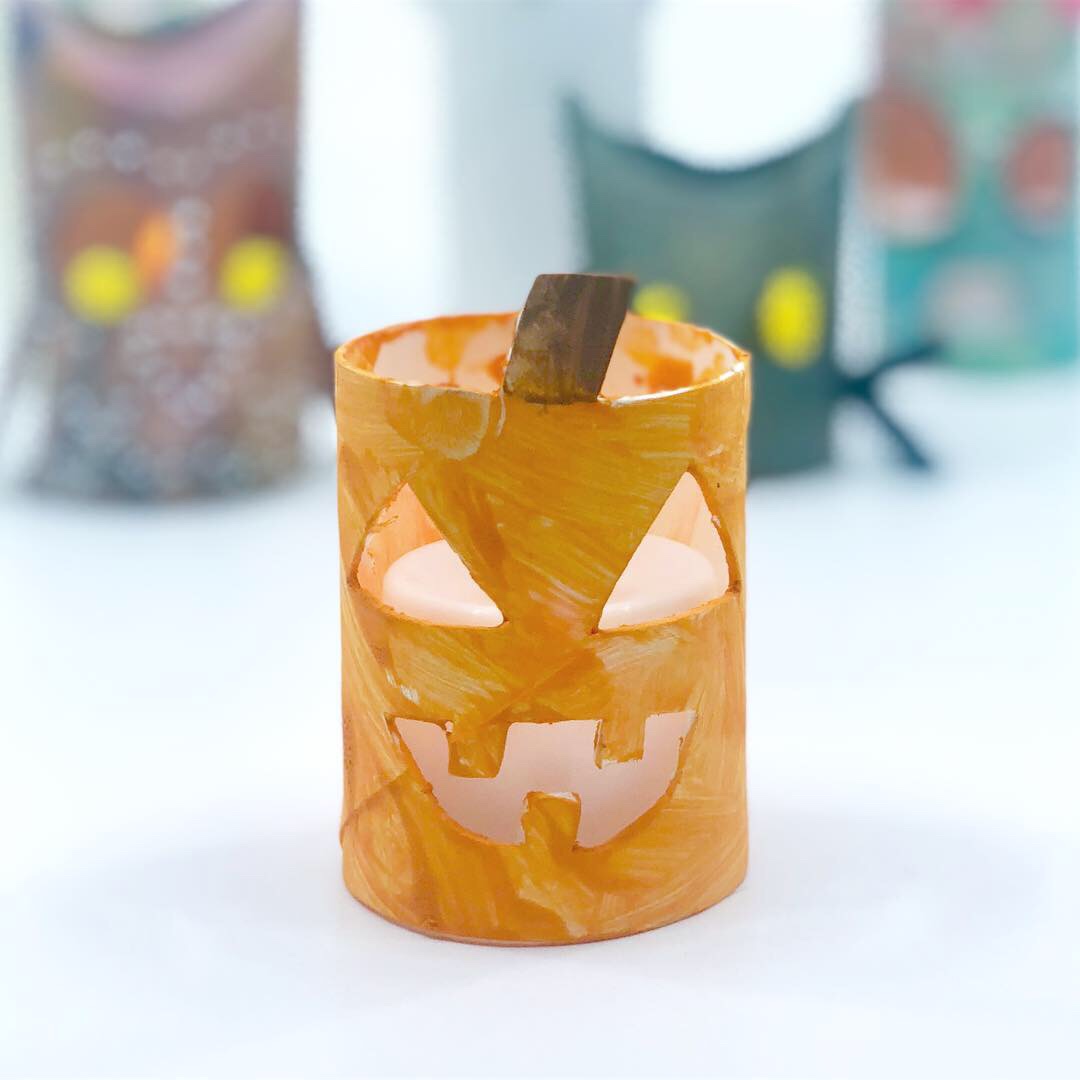
Jack-o-Lantern
Cutting this was the closest as I’ll get to carving a pumpkin this year. Mine is just as cute as any real jack-o-lantern, but without the mess!
Mummy
I don’t know what it is with toddlers and tape. The Dumpling could spend 30 minutes peeling, cutting, and sticking tape on anything!
Peel masking tape and stick it onto the toilet paper roll. There’s really no wrong way to go about this—it doesn’t matter which direction the tape goes on, how uniformed the tape is ripped, or how much tape is used—all these “imperfections” give the mummy character. The Dumping ended up putting on so much tape, she blinded our mummy so I had to cut out the eyes again!
Zombie
Puncture a small hole on each side of the head (roughly where the temples are located) to insert the brass fasteners.
Paint the bubble wrap pink, roll it roughly into an ovoid with the bubbles facing outward, and insert it on top of the toilet paper roll where the zombie’s brain would be. Have extra bubble wrap on the side because the Dumpling and I couldn’t stop popping them! Warning: The craft paint flaked off everywhere once it dried. Unless you’re coloring with something that is more permanent, the brain is mostly for decorative purposes and less for play.
Cat
Fold the top halves of the toilet paper roll inward to create the ears. This should preferably be done prior to coloring the cat.
Cut two pieces of pipe cleaner and fold them in half. The length depends on how long you want the whiskers. Mine were approximately 2 inches before they were folded in halves.
Puncture a small hole on each cheek where the whiskers would be and insert the pipe cleaner with the “v” side going into the toilet paper roll.
Owl
Fold the top halves of the toilet paper roll inward to create the ears. This step should preferable be done prior to painting the owl.
I found a color changing LED candle (from the Dumping’s old Mickey balloon we got at Disney) and tucked it inside one of the creatures. Doesn’t my toilet paper roll gang look like they’re having an awesome party?
I recently scored a free bag of puffy fabric paints from a crafter giving them away on Facebook, so the Dumpling and I have been experimenting with this new material (it’s new to us!) all week. After a quick search online, it’s quite a versatile medium for crafting!
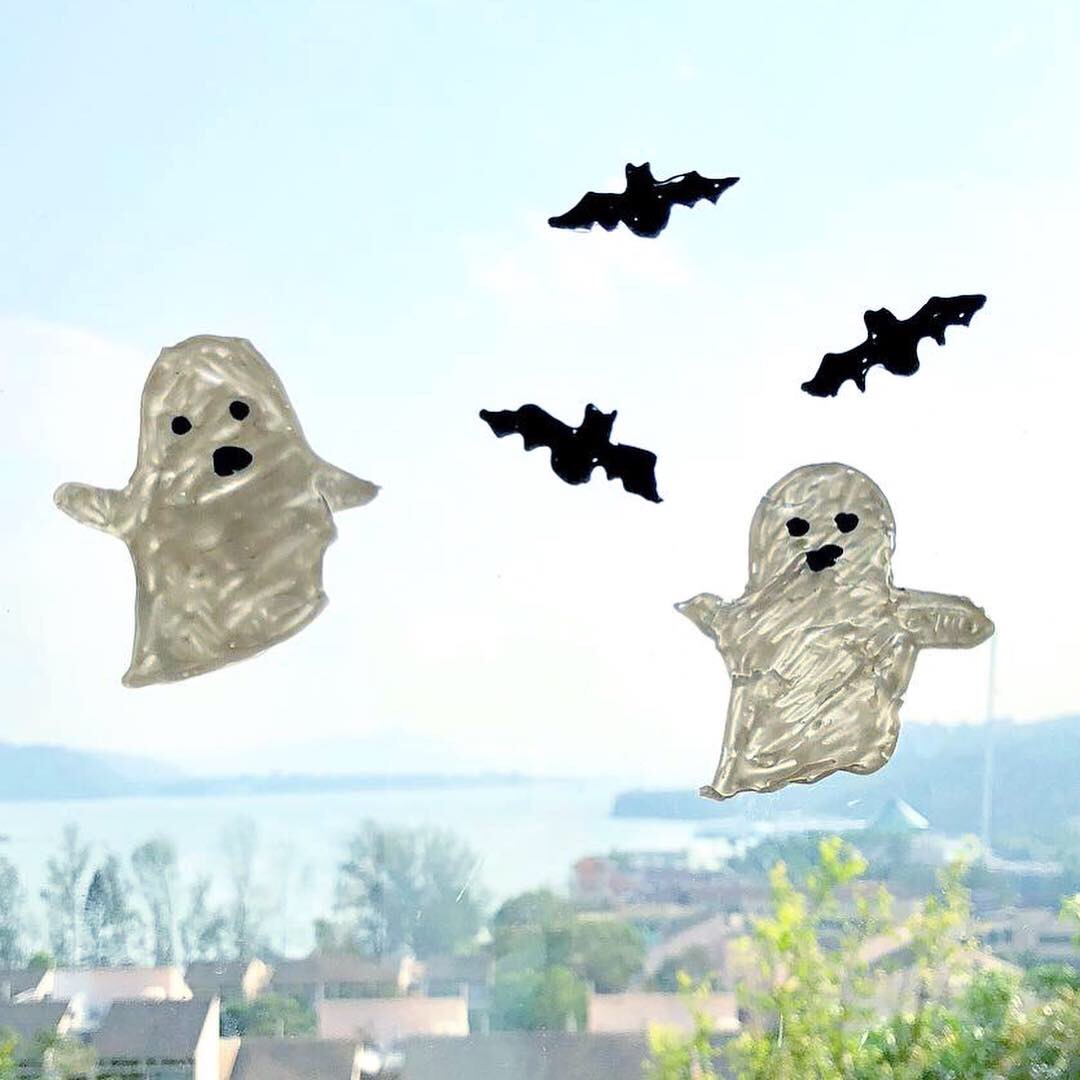
Puffy Fabric Paint Window Cling
Window clings are like stickers, but puffy and not as so annoying to peel off (I hope). The Dumpling had fun sticking and re-arranging these not-so-spooky decorations all over. We discovered that they actually clinged not only to glass, but to any flat non-porous surface!
Draw an image onto the ziplock bag with puffy fabric paint—that’s it! You can either free draw or trace the image by placing the design printout under the bag. I tested this step on several types of plastic (ziplock bag, polypropylene plastic bag, and clear plastic presentation cover) but the ziplock bag was the obvious winner in terms of ease of use.
Let the paint dry completely (about 24 hours) before peeling the images off. Waiting was probably the hardest part. Due to my impatience, I actually ruined a few—don’t be like me.
Puffy Fabric Paint Stamps
This was a fun way to make custom stamps, but I found that they didn’t produce the cleanest impressions. They were sufficient for the Dumpling, however, since she didn’t really care about smudges and was just amused by the whole stamping process.
Cardboard or styrofoam (I preferred styrofoam because I got a few uses out of the stamps by rinsing the paint/ink off afterwards)
Bottle cap
Glue
Stamp ink or paint
Draw your design onto the cardboard or styrofoam to create the stamp. After I drew the initial image, I traced over it again with additional paint to create a deeper emboss.
Once the paint dried, cut a square or rectangle around the image to form the stamp base.
Glue a bottle cap onto the back side of the stamp. Creating the knobs is completely optional, but we found that the stamps were easier to handle with them.
Use a stamp ink or apply paint directly onto the stamp with a brush. I found that the latter method created cleaner outlines.
Puffy Fabric Paint Masquerade Mask
The Dumpling has an upcoming masquerade at school, so I wanted to make her a mask for the party. While using fabric paint was a good way to create custom designs, the material ended up being too delicate for toddler hands since she would be pulling the mask off and putting it back on every two minutes.
Elastic long enough to snuggly fit around your head.
Draw or print the mask template you would like to use. Alternatively click here to download my design, but please be aware the mask dimensions measures approximately 10″ by 5.25″ so it might not fit you! I actually scaled the image in several different sizes on screen (one is wider, another is shorter, etc.) and chose the version with the best fit from the printout.
Tape the mask printout onto your work area, then tape the ziplock bag onto the printout, and finally tape the tulle or mesh fabric onto the bag. You really really really don’t want anything to move.
Trace the image with puffy fabric paint.
Let the paint dry (about 24 hours) before peeling the mask off the ziplock bag.
Carefully cut the tulle or mesh fabric following the outline of the mask. Leave a piece of fabric uncut around both ends of the mask that are closest to your ears. The fabric needs to be large enough to make a small slit to string the elastic through.